Product updates
What’s new in Circuit for Teams
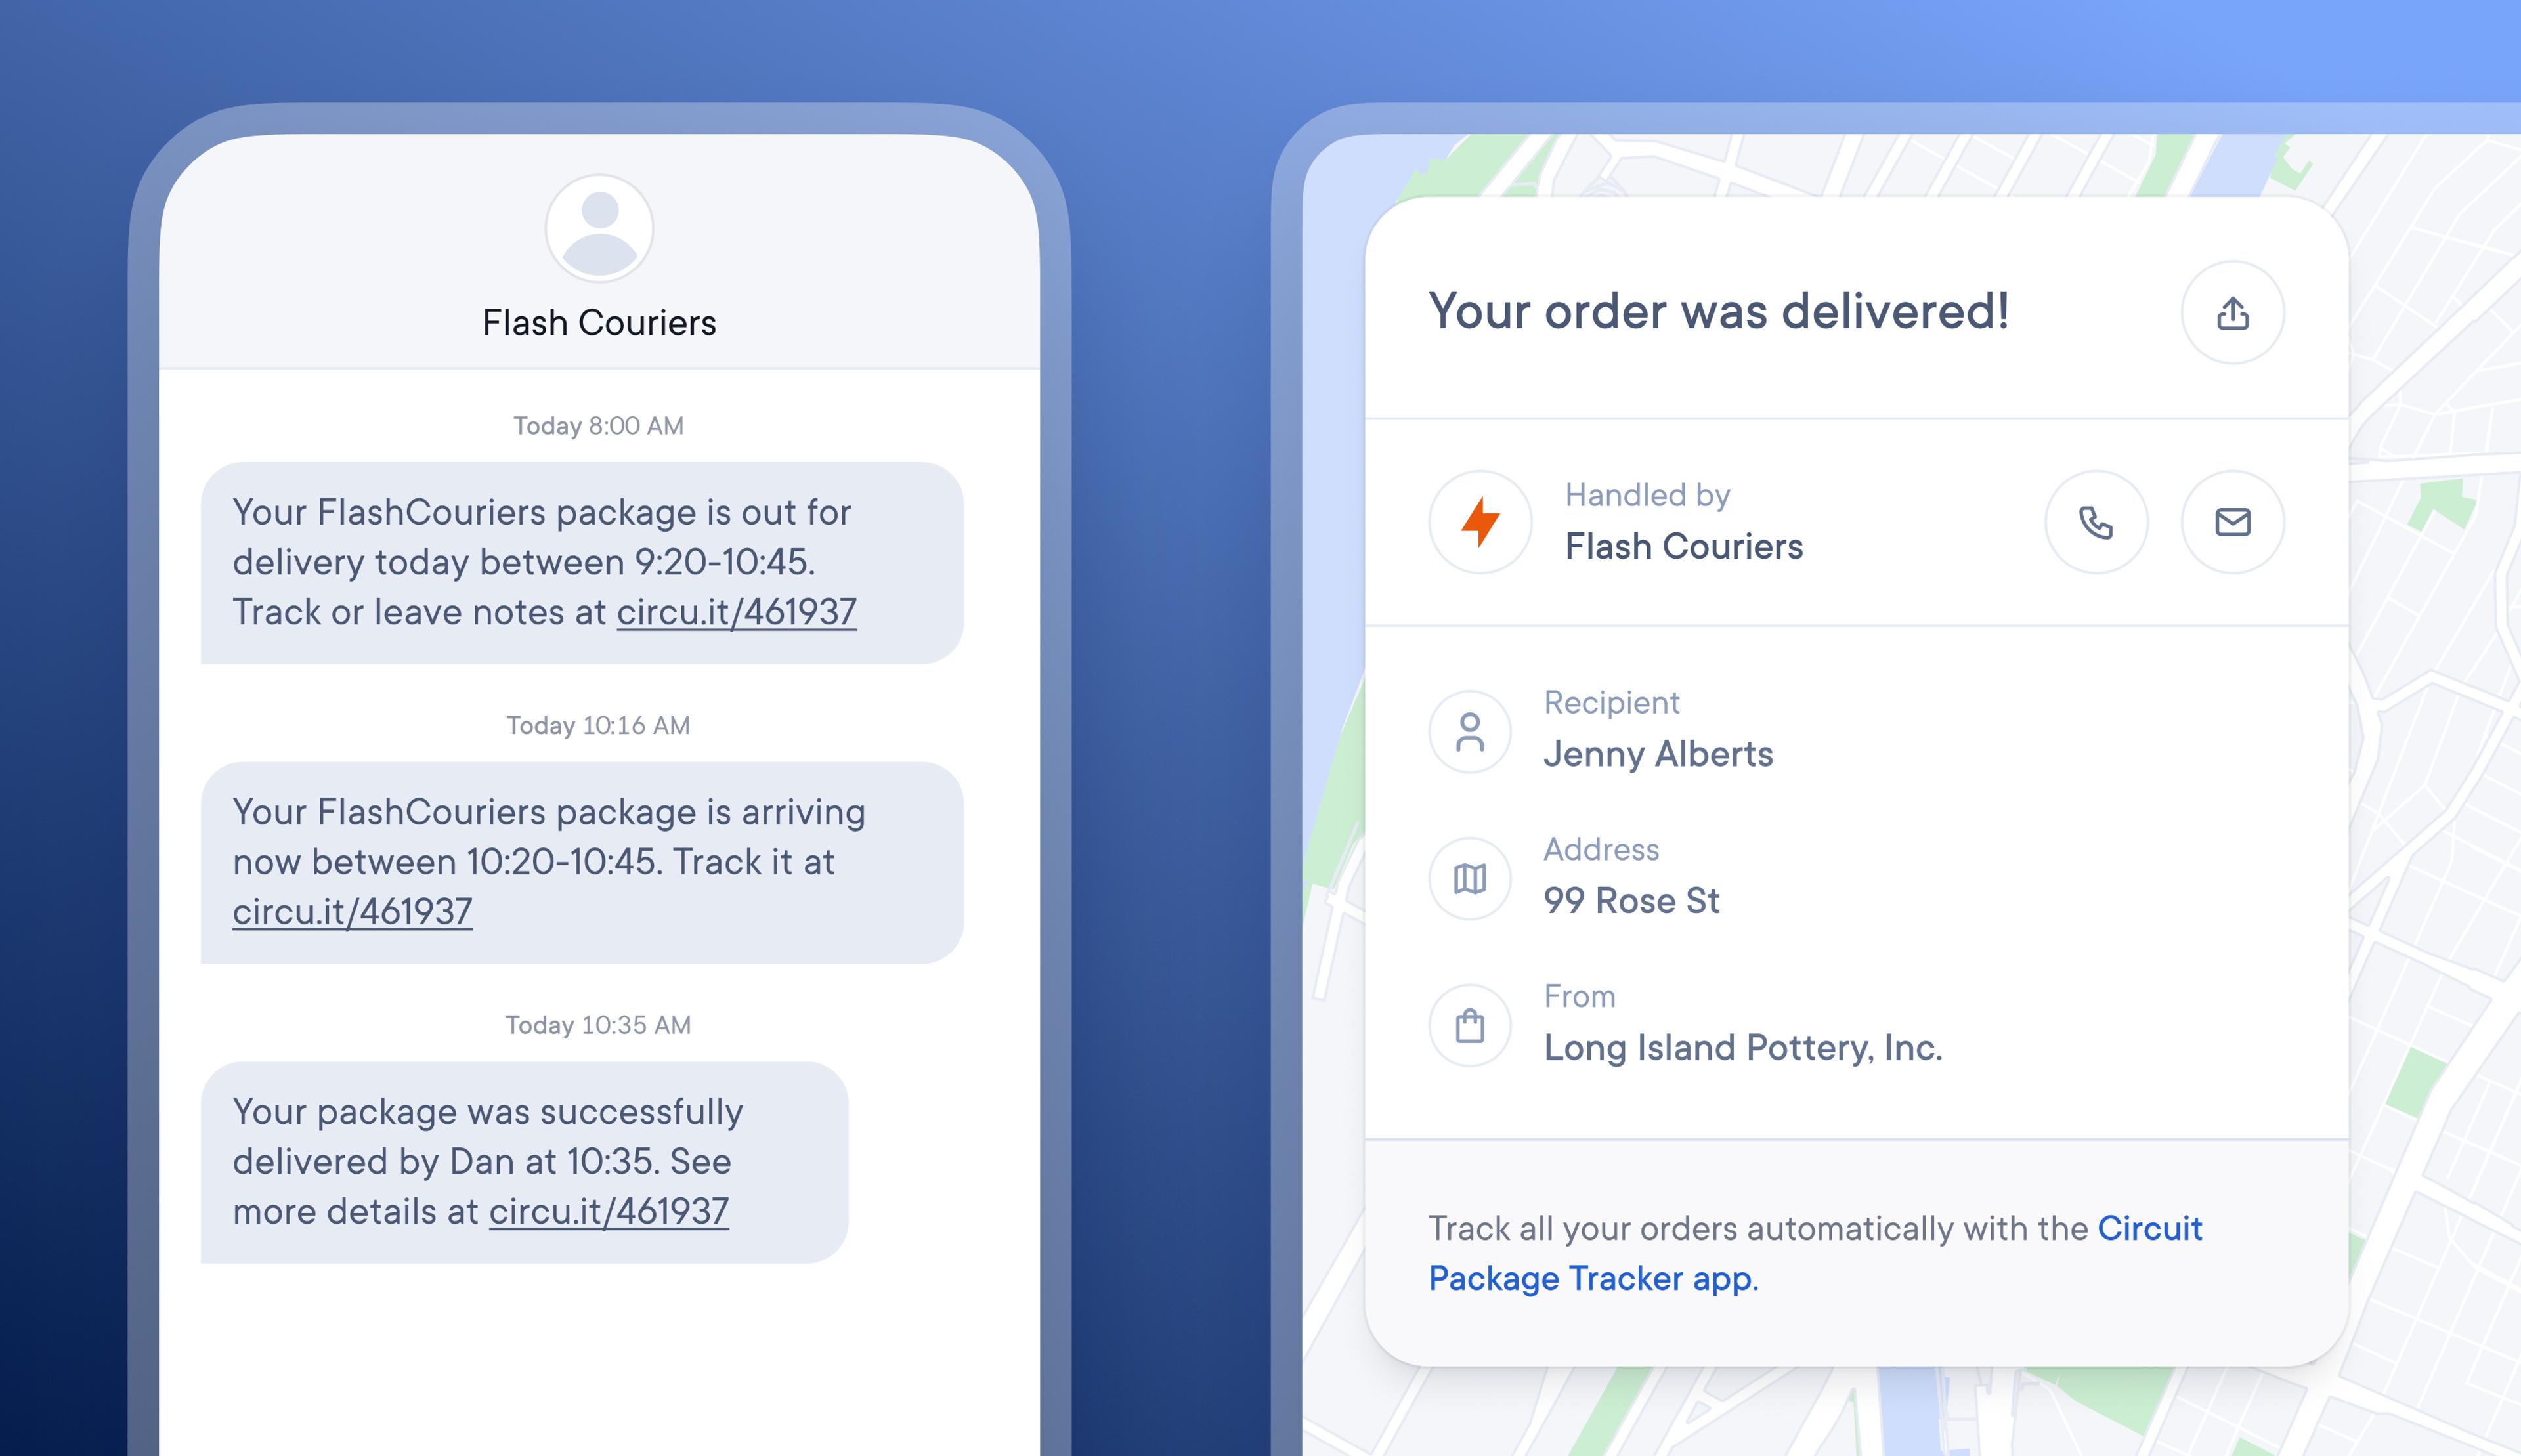
Add custom branding to recipient notifications to increase trust and awareness.
By default, SMS notifications for recipients are sent from Circuit, and tracking pages are also branded with Circuit's logo. However, recipients are unlikely to recognize or trust the Circuit brand. They are typically expecting delivery notifications that are branded with the name of the retailer they purchased from or the courier handling their delivery.
Users on the Circuit for Teams Pro Plan can now enhance the trust and recognition levels of their recipient notifications by adding their company logo and contact details to the recipient tracking page and creating a branded SMS sender name.
How to add company branding to recipient notifications
- Go to Workspace > General > Profile
- Company logo > Upload your logo
- Use the slider to adjust the logo size > Save image
- Your company logo will now appear on the recipient tracking page link
- Go to External parties > Recipient notification > Advanced SMS options
- Add your custom sender name
- Your custom sender name will now appear when a recipient receives their SMS notification
More easily find, edit, and understand route settings, and set route overrides.
Often, Dispatchers can notice something on a route, such as crisscrossing drivers or one driver having a disproportionate workload, and not understand the reason for routes being optimized in this way.
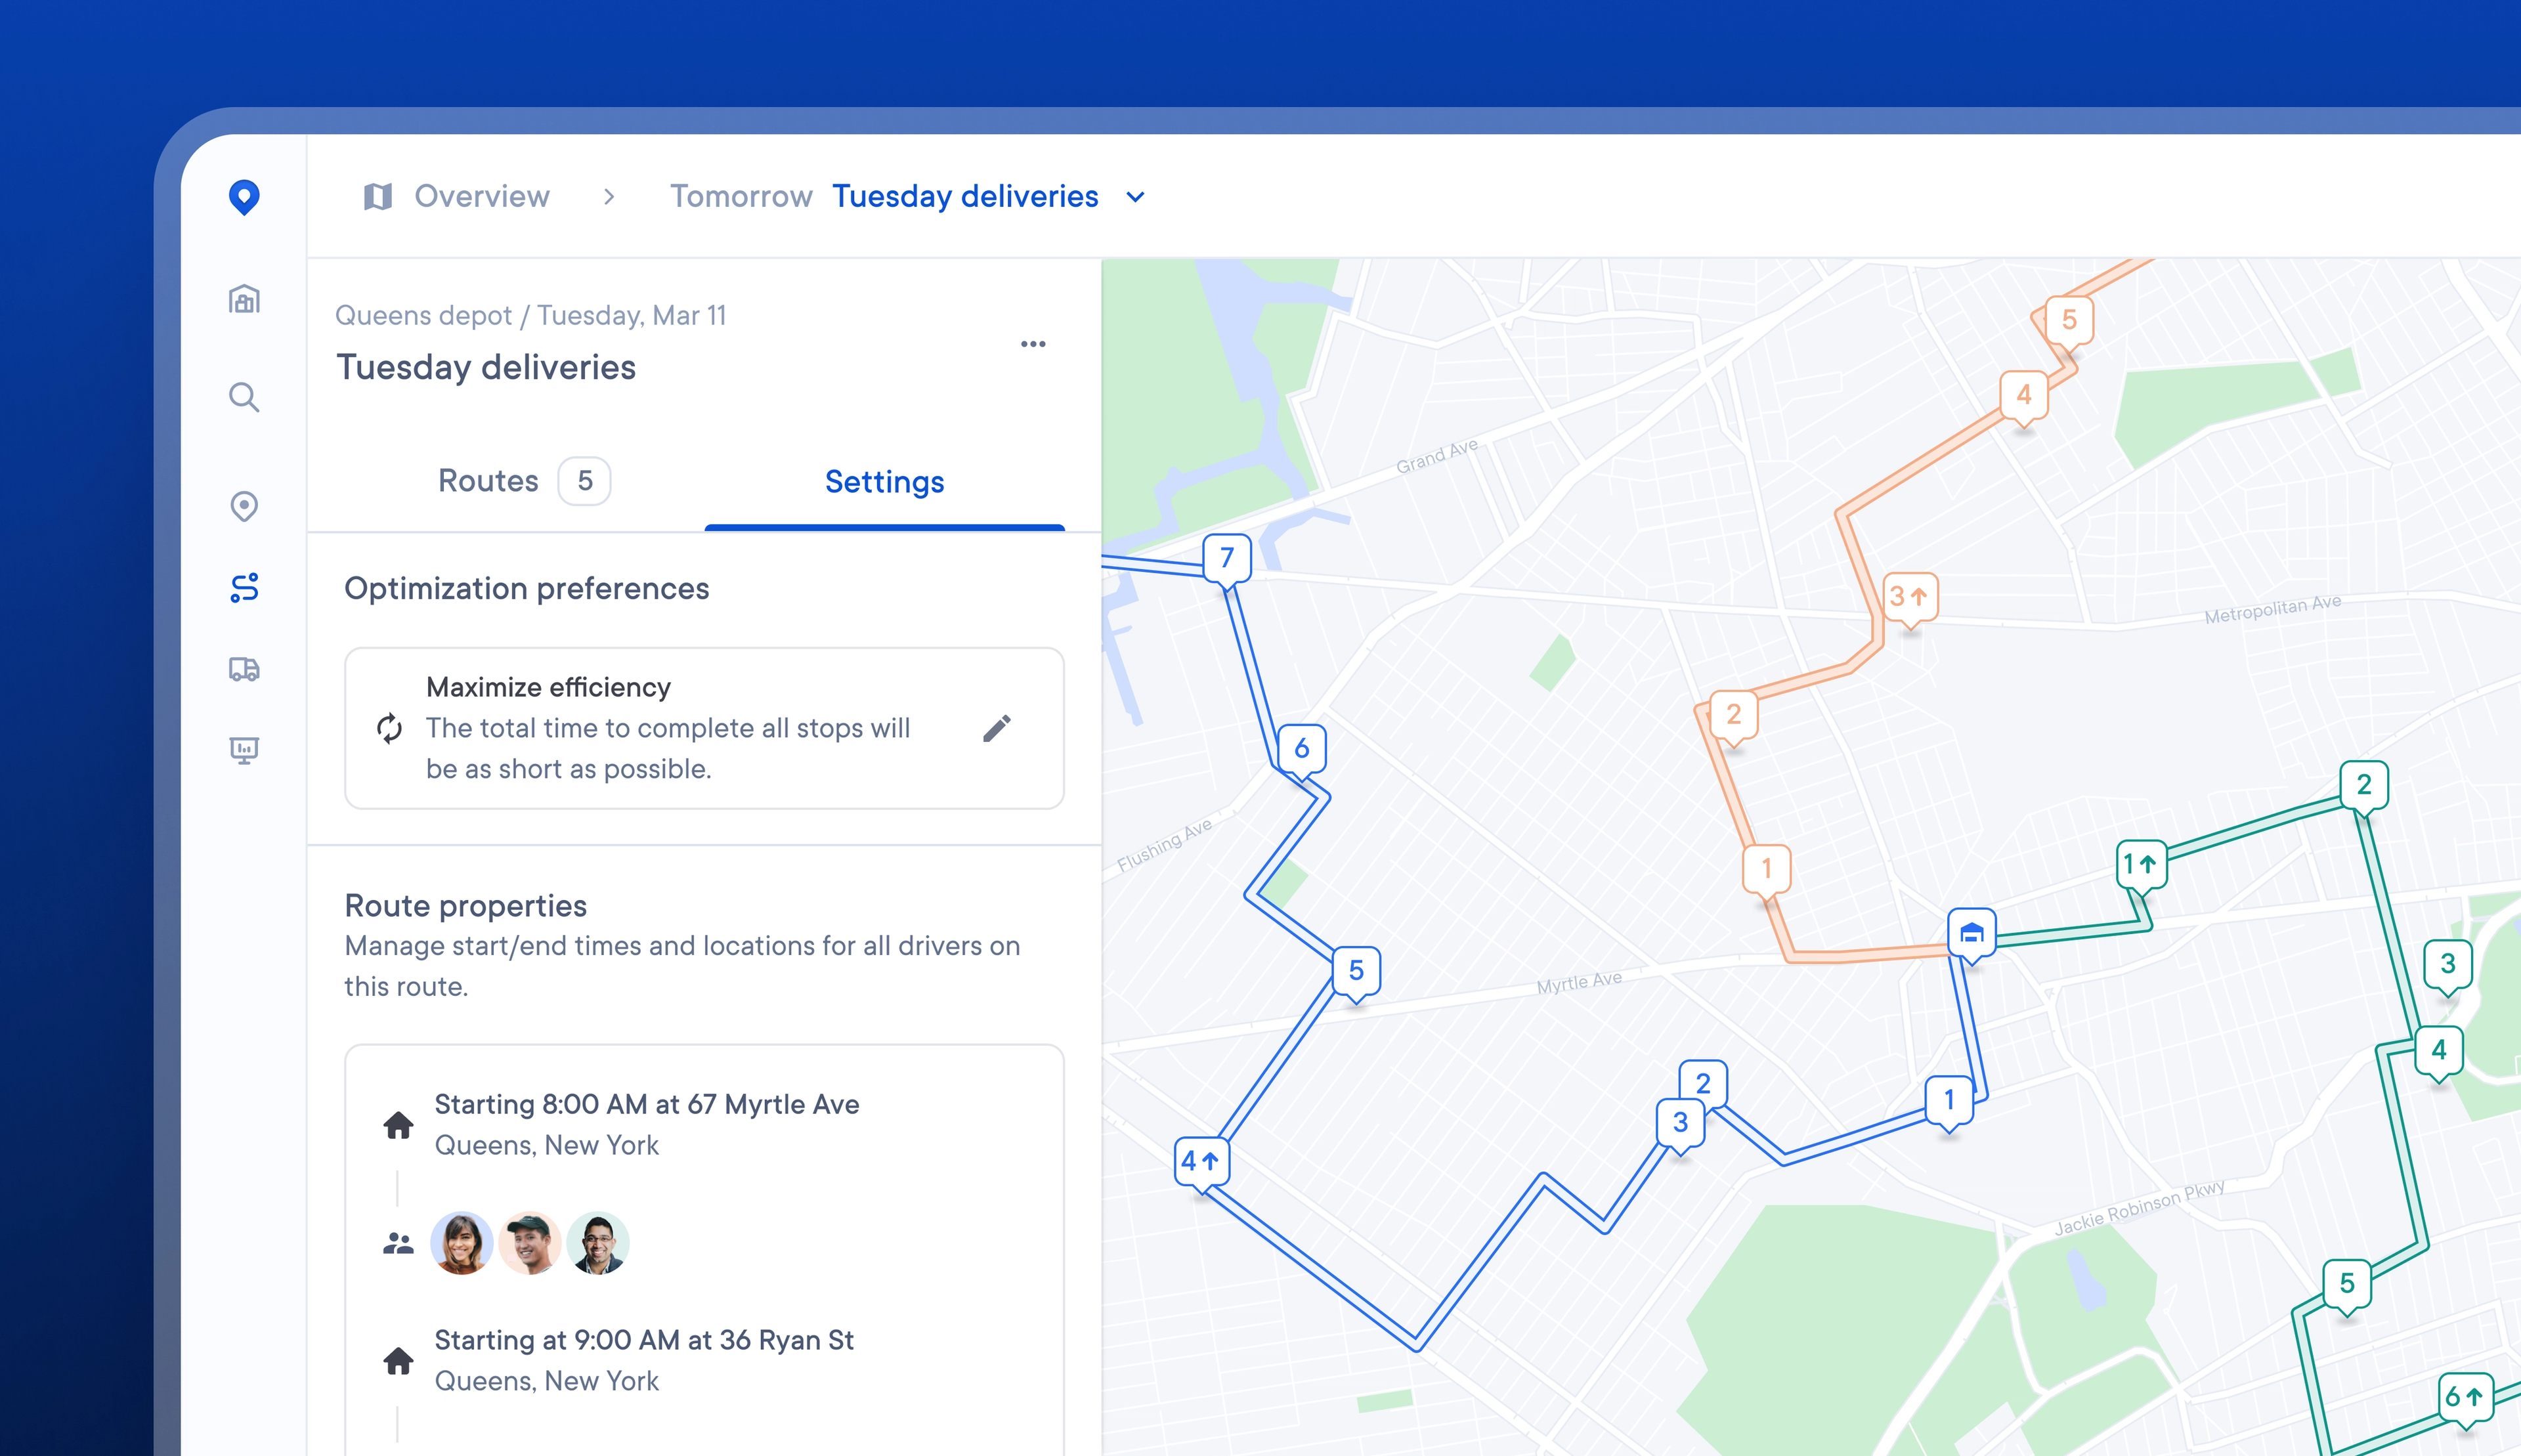
Now, it is easier and faster to access and edit route-level settings, allowing Dispatchers to visualize their impact better and change them if needed.
On a route, Dispatchers can now toggle to see and edit each route’s optimization preferences and properties, and preview the impact of any changes on the route map view.
Route overrides can also be set on an individual route, allowing for easier customization of start locations, driving speed, and more.
How to edit route settings and set route overrides:
- On a route toggle to > Settings
- To edit your route optimization preferences, click > the pencil icon
- Select the optimization preference you would like to use for this route
- To edit your route properties, click > Set route overrides
- Edit the route start/end location, start/end time, maximum number of stops, driving speed and delivery speed
- These changes will be automatically saved and will only apply to this route
How Drivers can use Stop IDs to quickly and easily find the right package
It can be hard for Drivers to find one brown cardboard package in a vehicle full of brown cardboard packages, and searching for the correct item at a stop can waste valuable time.
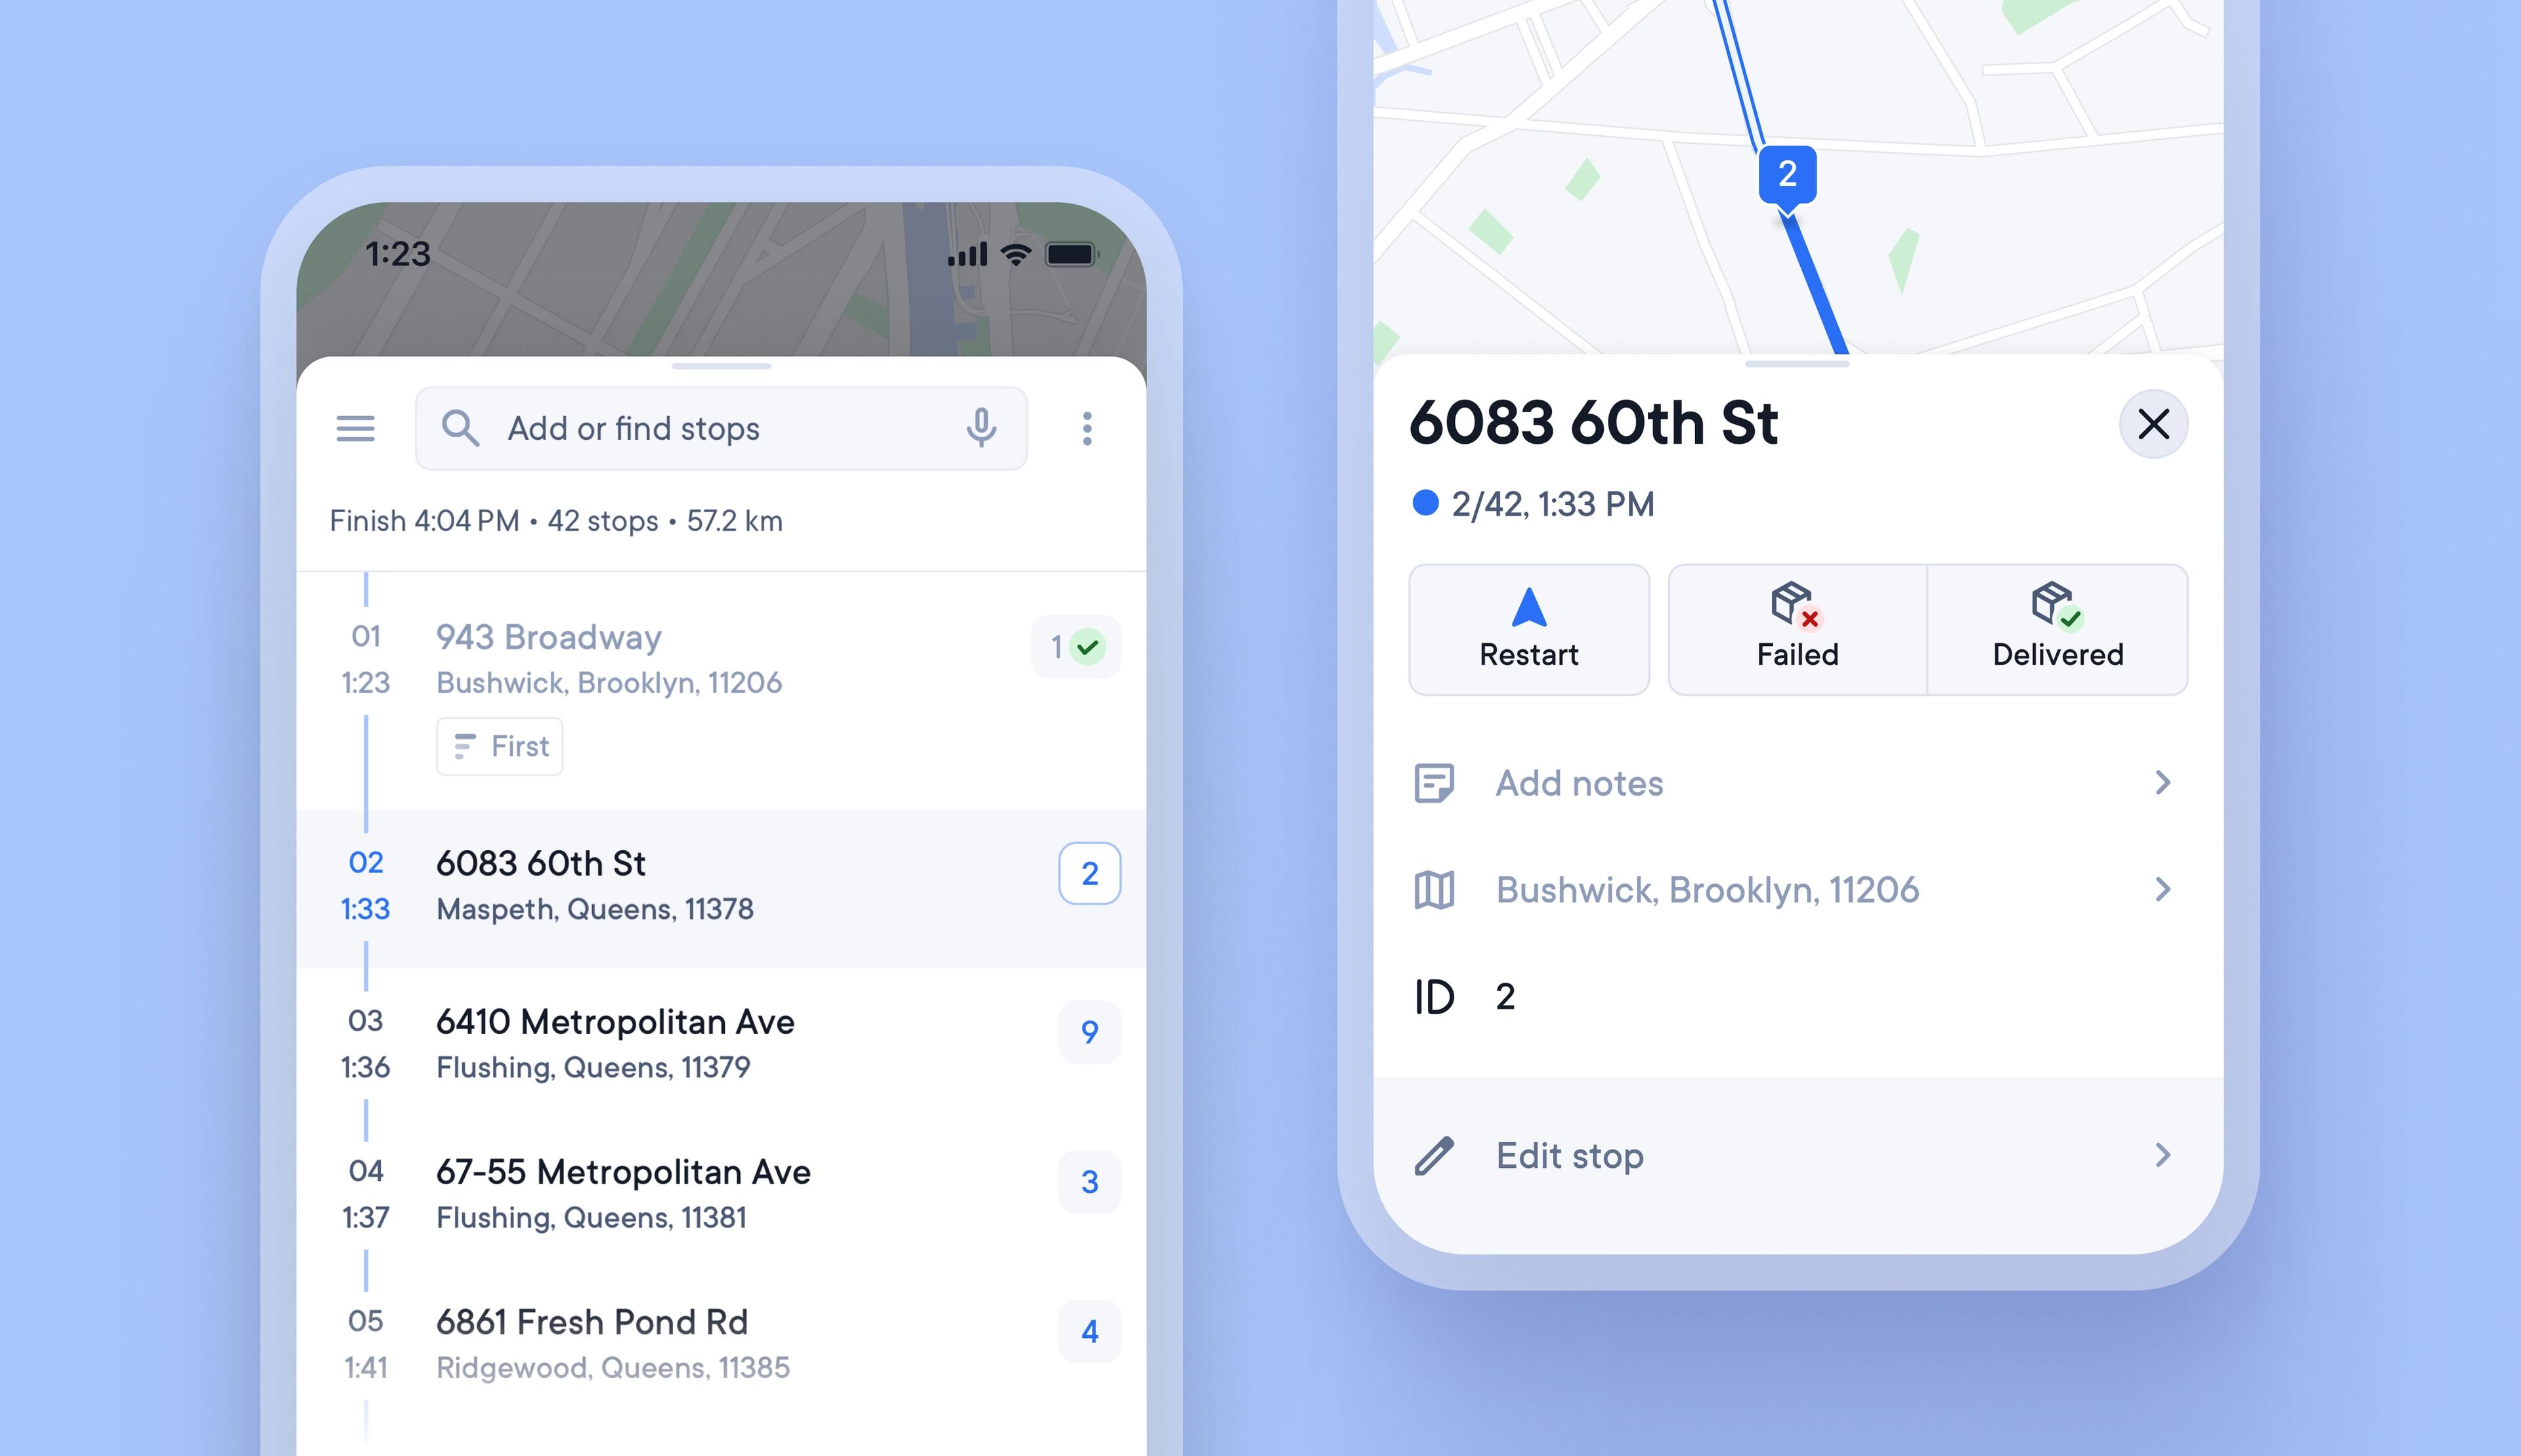
Unique Stop IDs are now automatically attached to every stop, and once a route is confirmed, they never change, even if the stop is edited or reoptimized.
Writing the Stop ID on each package can help Drivers load vehicles in a logical order, and the Stop ID is also displayed when approaching a stop, so that Drivers can instantly know which package to look for.
How Drivers can use Stop IDs to find packages faster
- In the Driver app go to Settings > Stop ID
- Select your Stop ID format
- Select > Modern to use alphanumeric Stop IDs A1 A2 A3
- Select > Legacy to use numeric Stop IDs 1 2 3
- Select when to assign Stop IDs, after optimizing your route, or as stops are added
- Once you tap > Confirm on a route Stop IDs will be fixed
Use the Circuit for Teams API to request proof of delivery
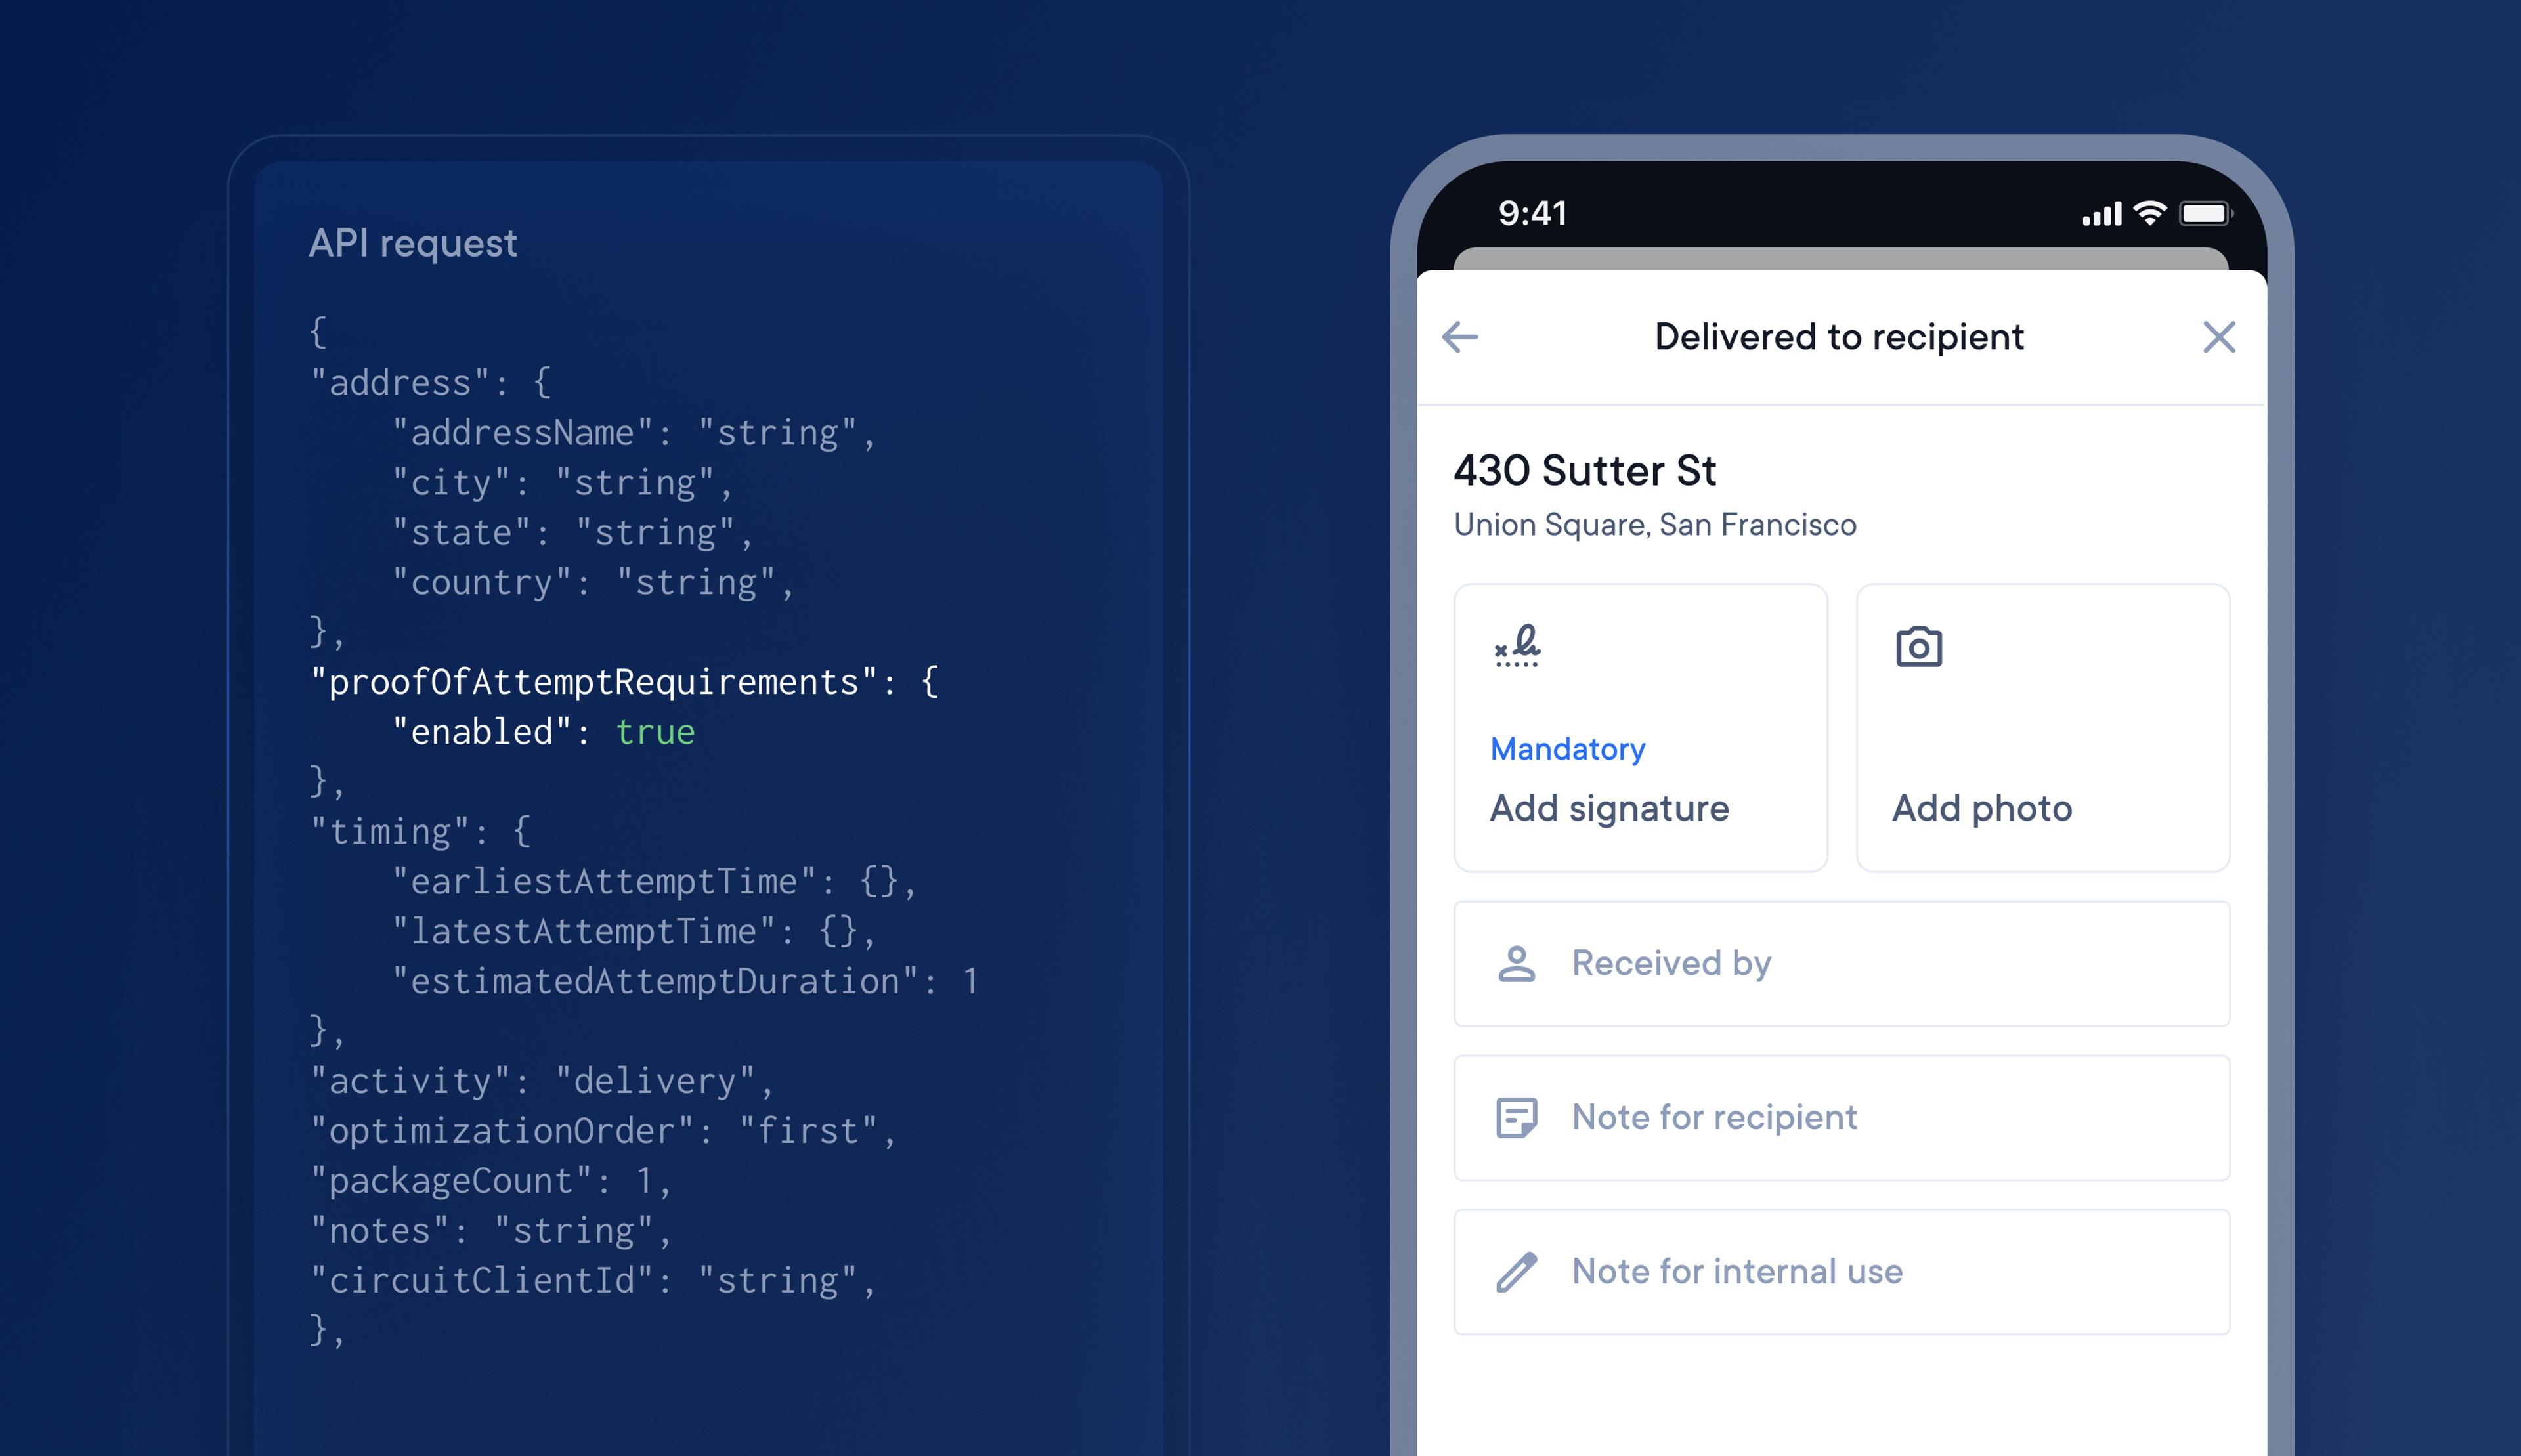
The latest update to our API means you can now add proof of delivery requirements.
Enhance your API integration to include proof of delivery requirements for stops, which will automatically use your POD global account settings.
Set the POD API field as False, and the feature will be turned off, and drivers will not be prompted to collect POD in their driver app.
Set POD API field as True, and the feature will be turned on for that stop with your global account settings for POD applied. Drivers will be prompted on their driver app to collect the type of POD specified in your global account settings, eg, signature POD is mandatory
How to add proof of delivery requirements to your API integration
- For each stop you want to require POD for add the field > proofOfAttemptRequirements
- Set the enabled flag to true, false, or null
- If marked as true, your global account settings for POD will be applied to stops
Enable clients to upload orders, track deliveries, and resolve disputes via the Client Portal.
Preparing client order data for import into Circuit for Teams can be a time-consuming yet necessary task, but that has just gotten easier.
Circuit’s Client Portal now allows your clients to import their orders directly into your Circuit for Teams account and instantly access real-time information about their deliveries.
Clients can import their orders at any time. Once an order is marked by the client as ready for delivery, it will automatically appear on your unassigned stops list as a delivery ready to be added to a route.
Clients can also track the status of their deliveries via the client portal, which allows them to resolve any customer disputes directly. All the information they need about a package’s progress and status is visible in real-time.
How clients can upload orders to the Client Portal
- Your client will log in to their client portal dashboard
- They will import a spreadsheet that contains the orders they want delivered
- Your client will select which imported orders they want to submit for delivery
- All submitted orders will then appear on your unassigned stops list, ready for delivery
- Your client will be able to track the live progress of every delivery via the client portal
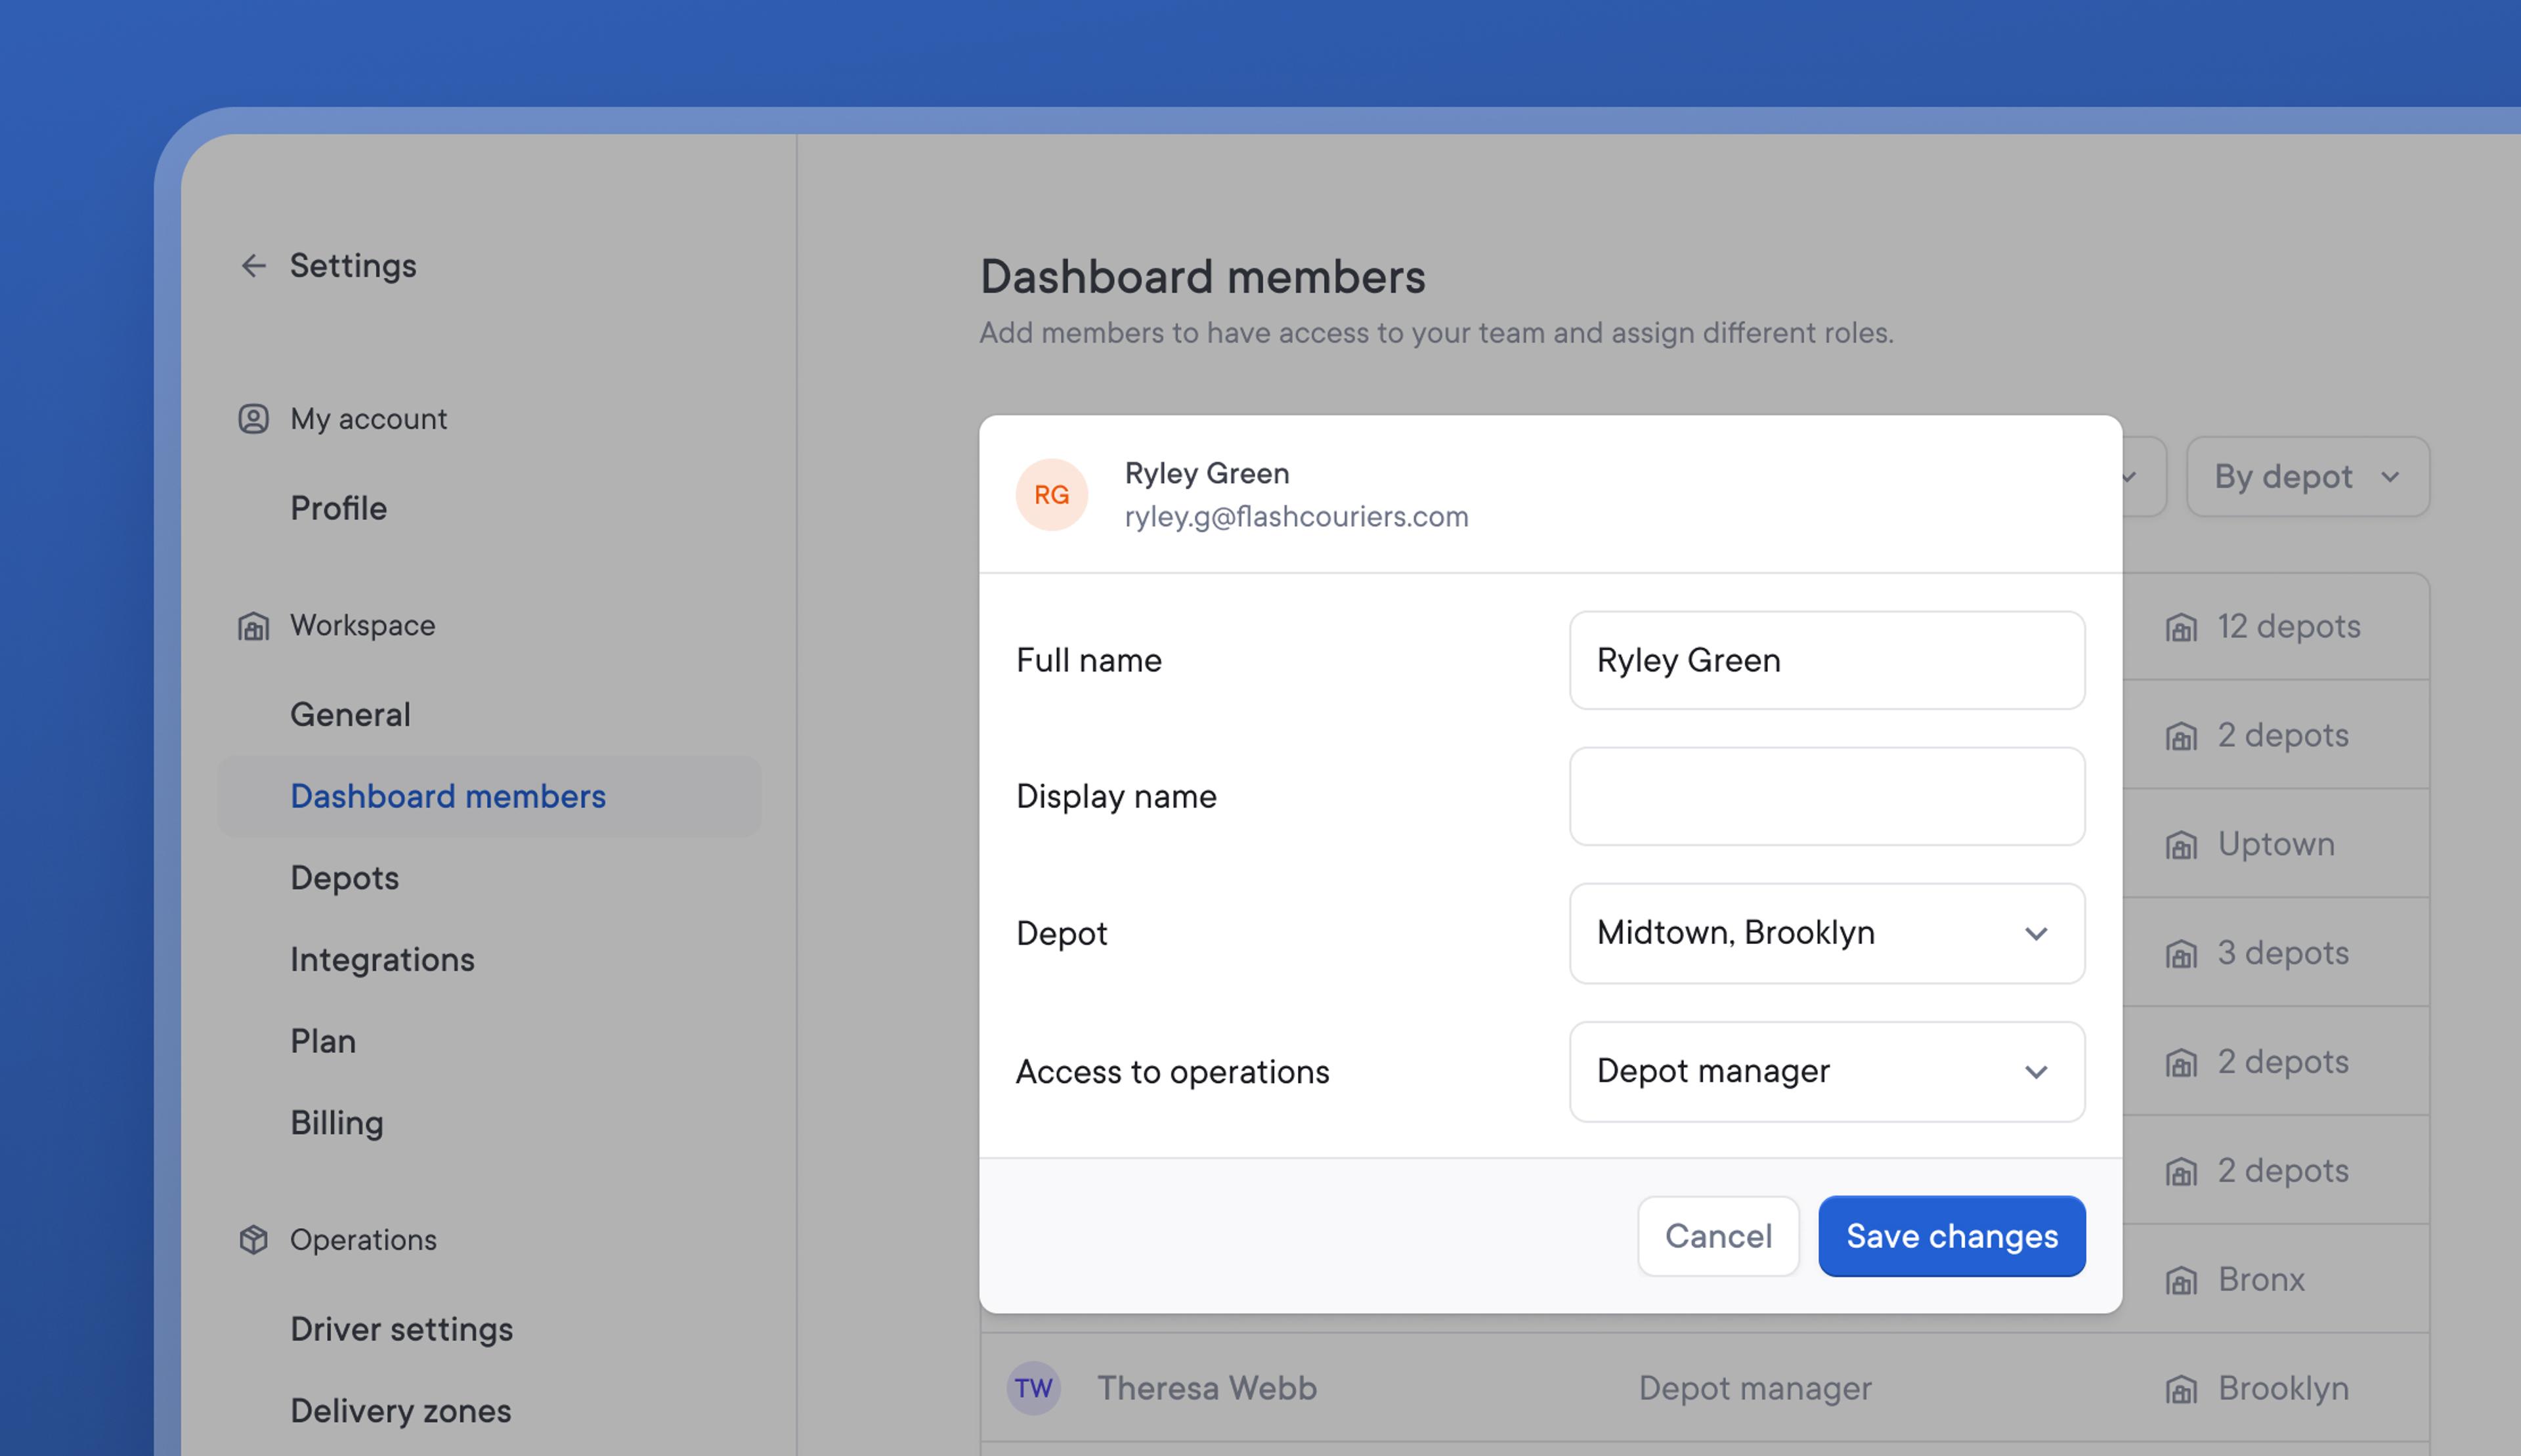
Easily control the level of account visibility given to dashboard members
Previously, all dashboard members could view and modify all account activity. Consequently, dashboard members from one depot could accidentally make changes that affected another depot.
The latest update to dashboard permissions means that Owners and Admins who have the highest level of permissions remain able to view and edit anything across their entire Circuit for Teams account.
Depot managers, Dispatchers, and Read-only roles can now only see and change activity for their assigned depots. This allows each depot to be managed independently and prevents unintentional changes.
How to assign depots to dashboard members:
- Go to Settings > Dashboard members
- Select a Dashboard member to edit
- Assign a Depot
- Assign a dashboard member role
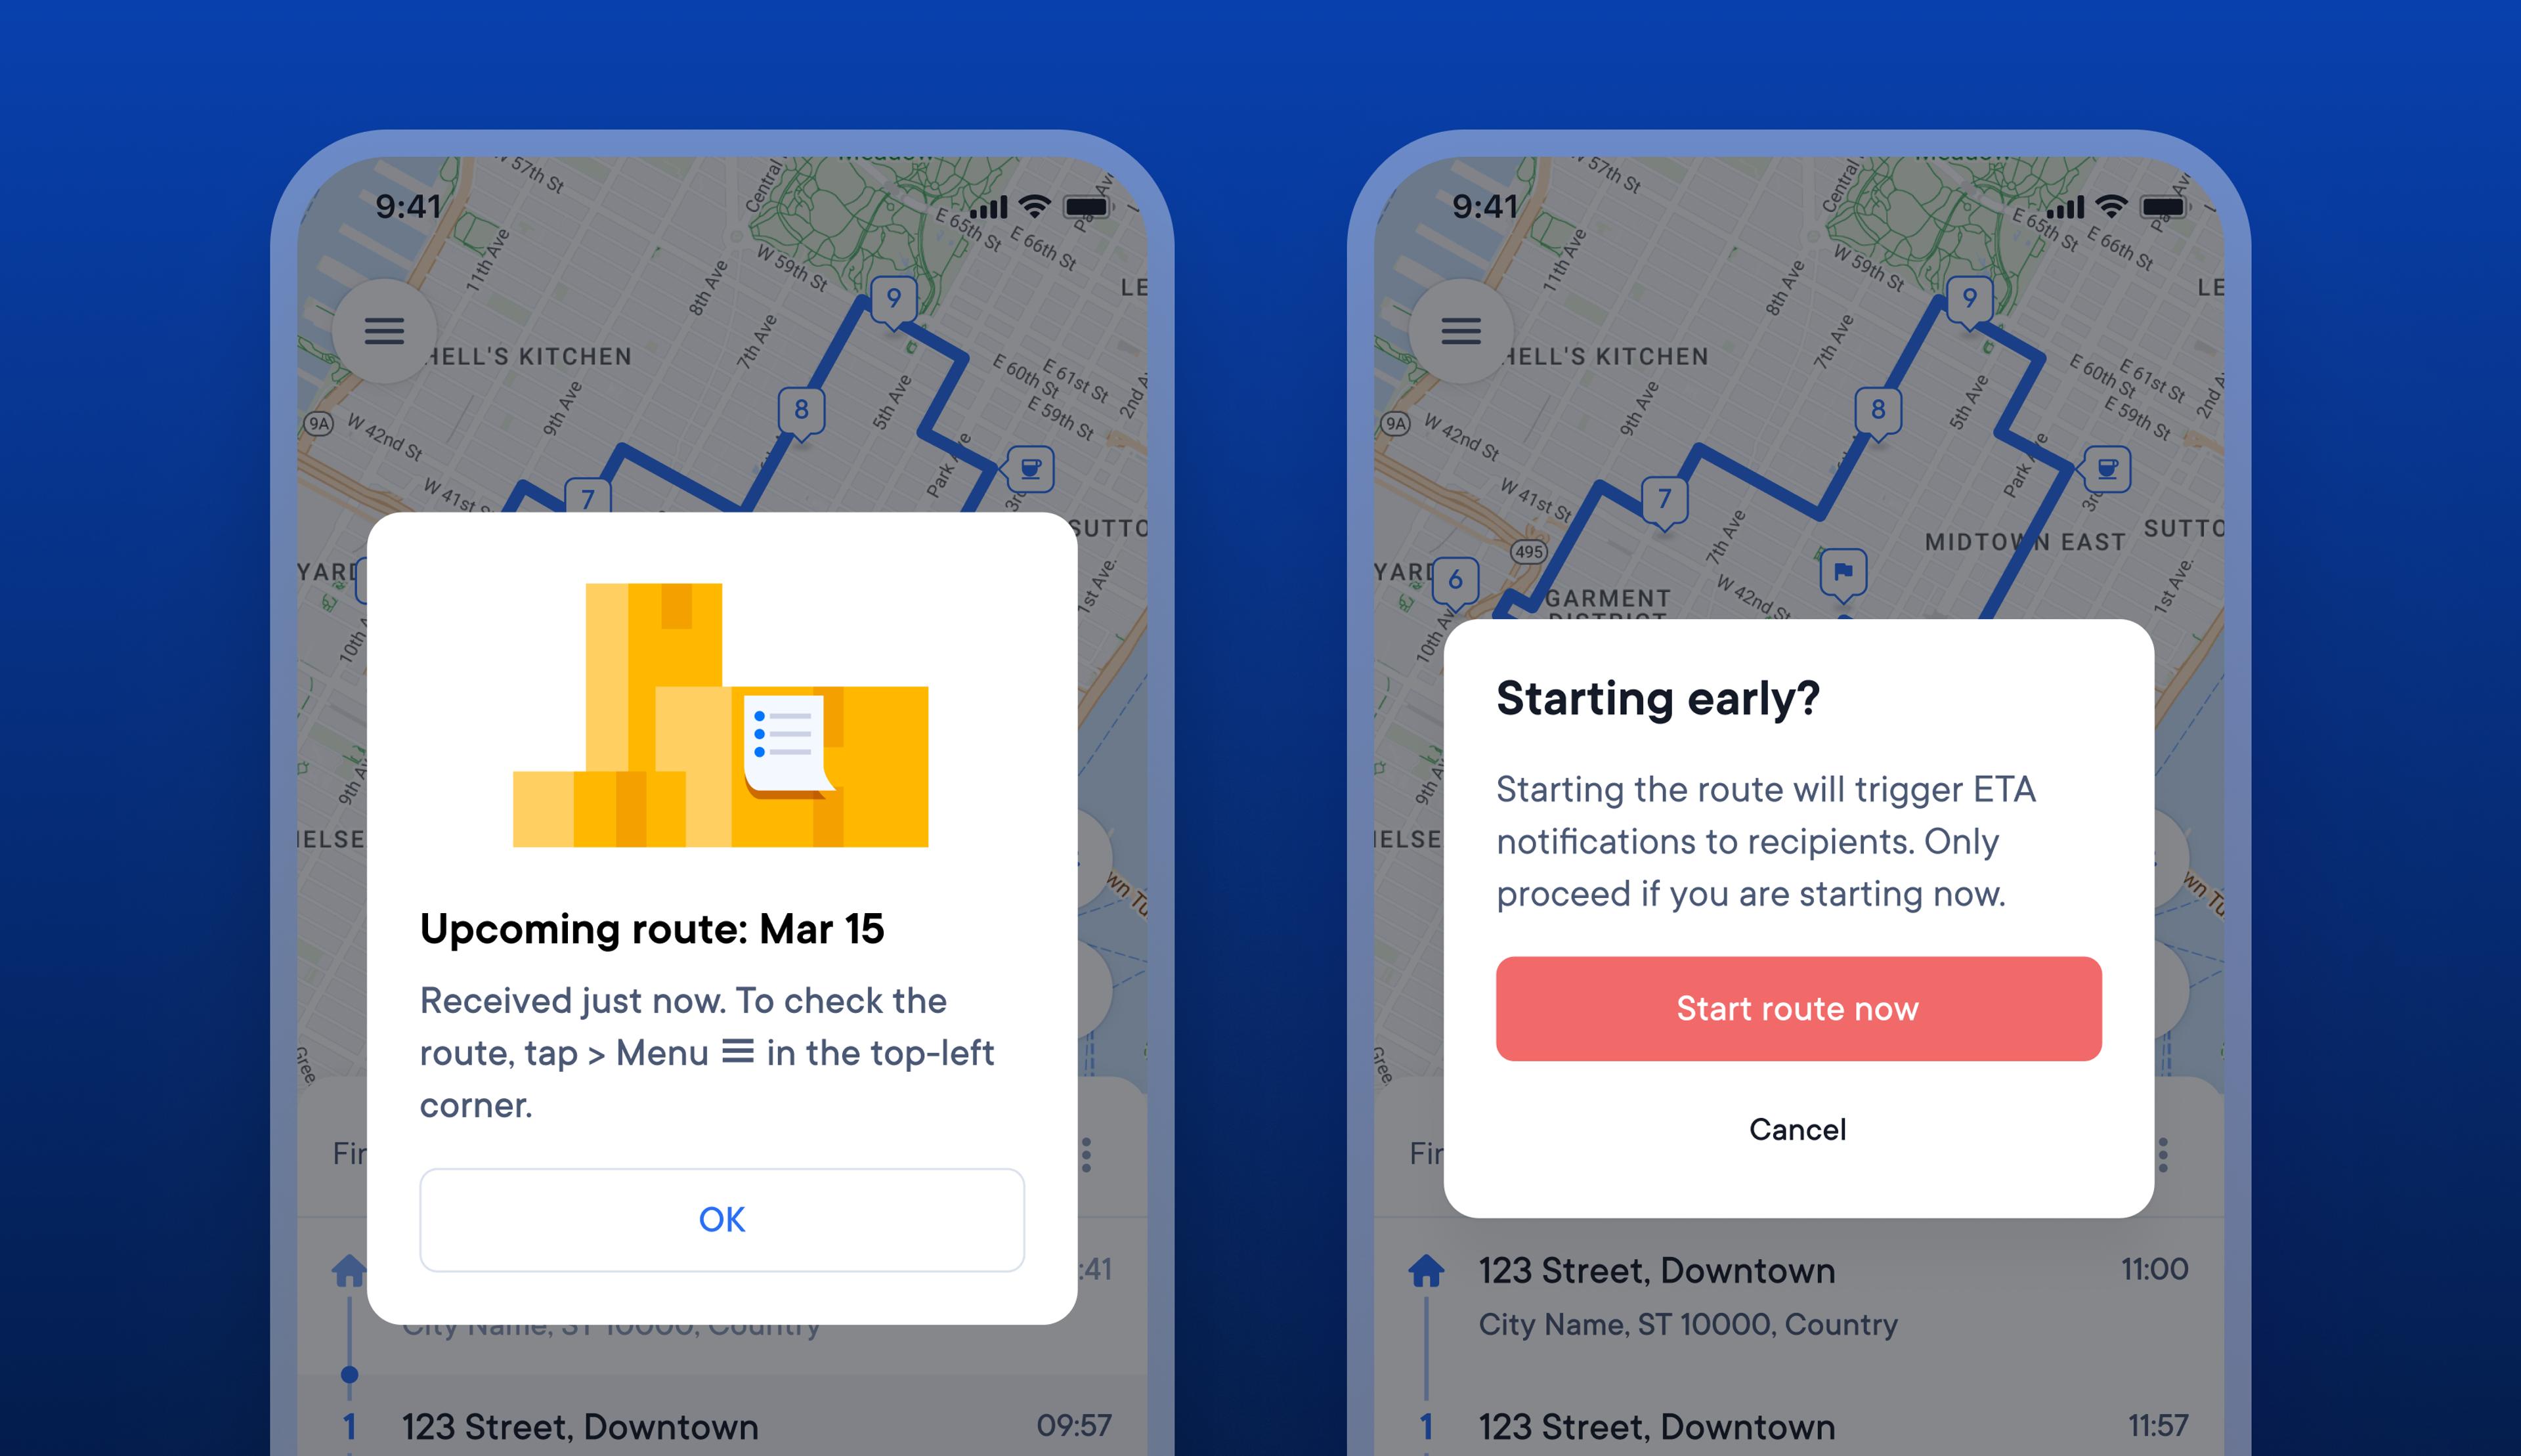
Updated notifications allow drivers to view a new route and warn that starting a route early will trigger recipient ETAs
Drivers sometimes tap start on their route so they can view the details of their journey several hours before actually beginning their route. This can have a knock-on impact on recipient ETAs, which are triggered when a driver taps start on a route.
When drivers tap start to look at their route but don't actually start their route for a while, recipients will receive incorrect ETAs based on the time the driver tapped start, not when they really began their route.
New notifications in the Driver app provide drivers with a clear warning before they start their route about the impact of that action on recipient ETAs. When a driver receives a new route notification, they are now guided to look at it in their routes list rather than tapping start.
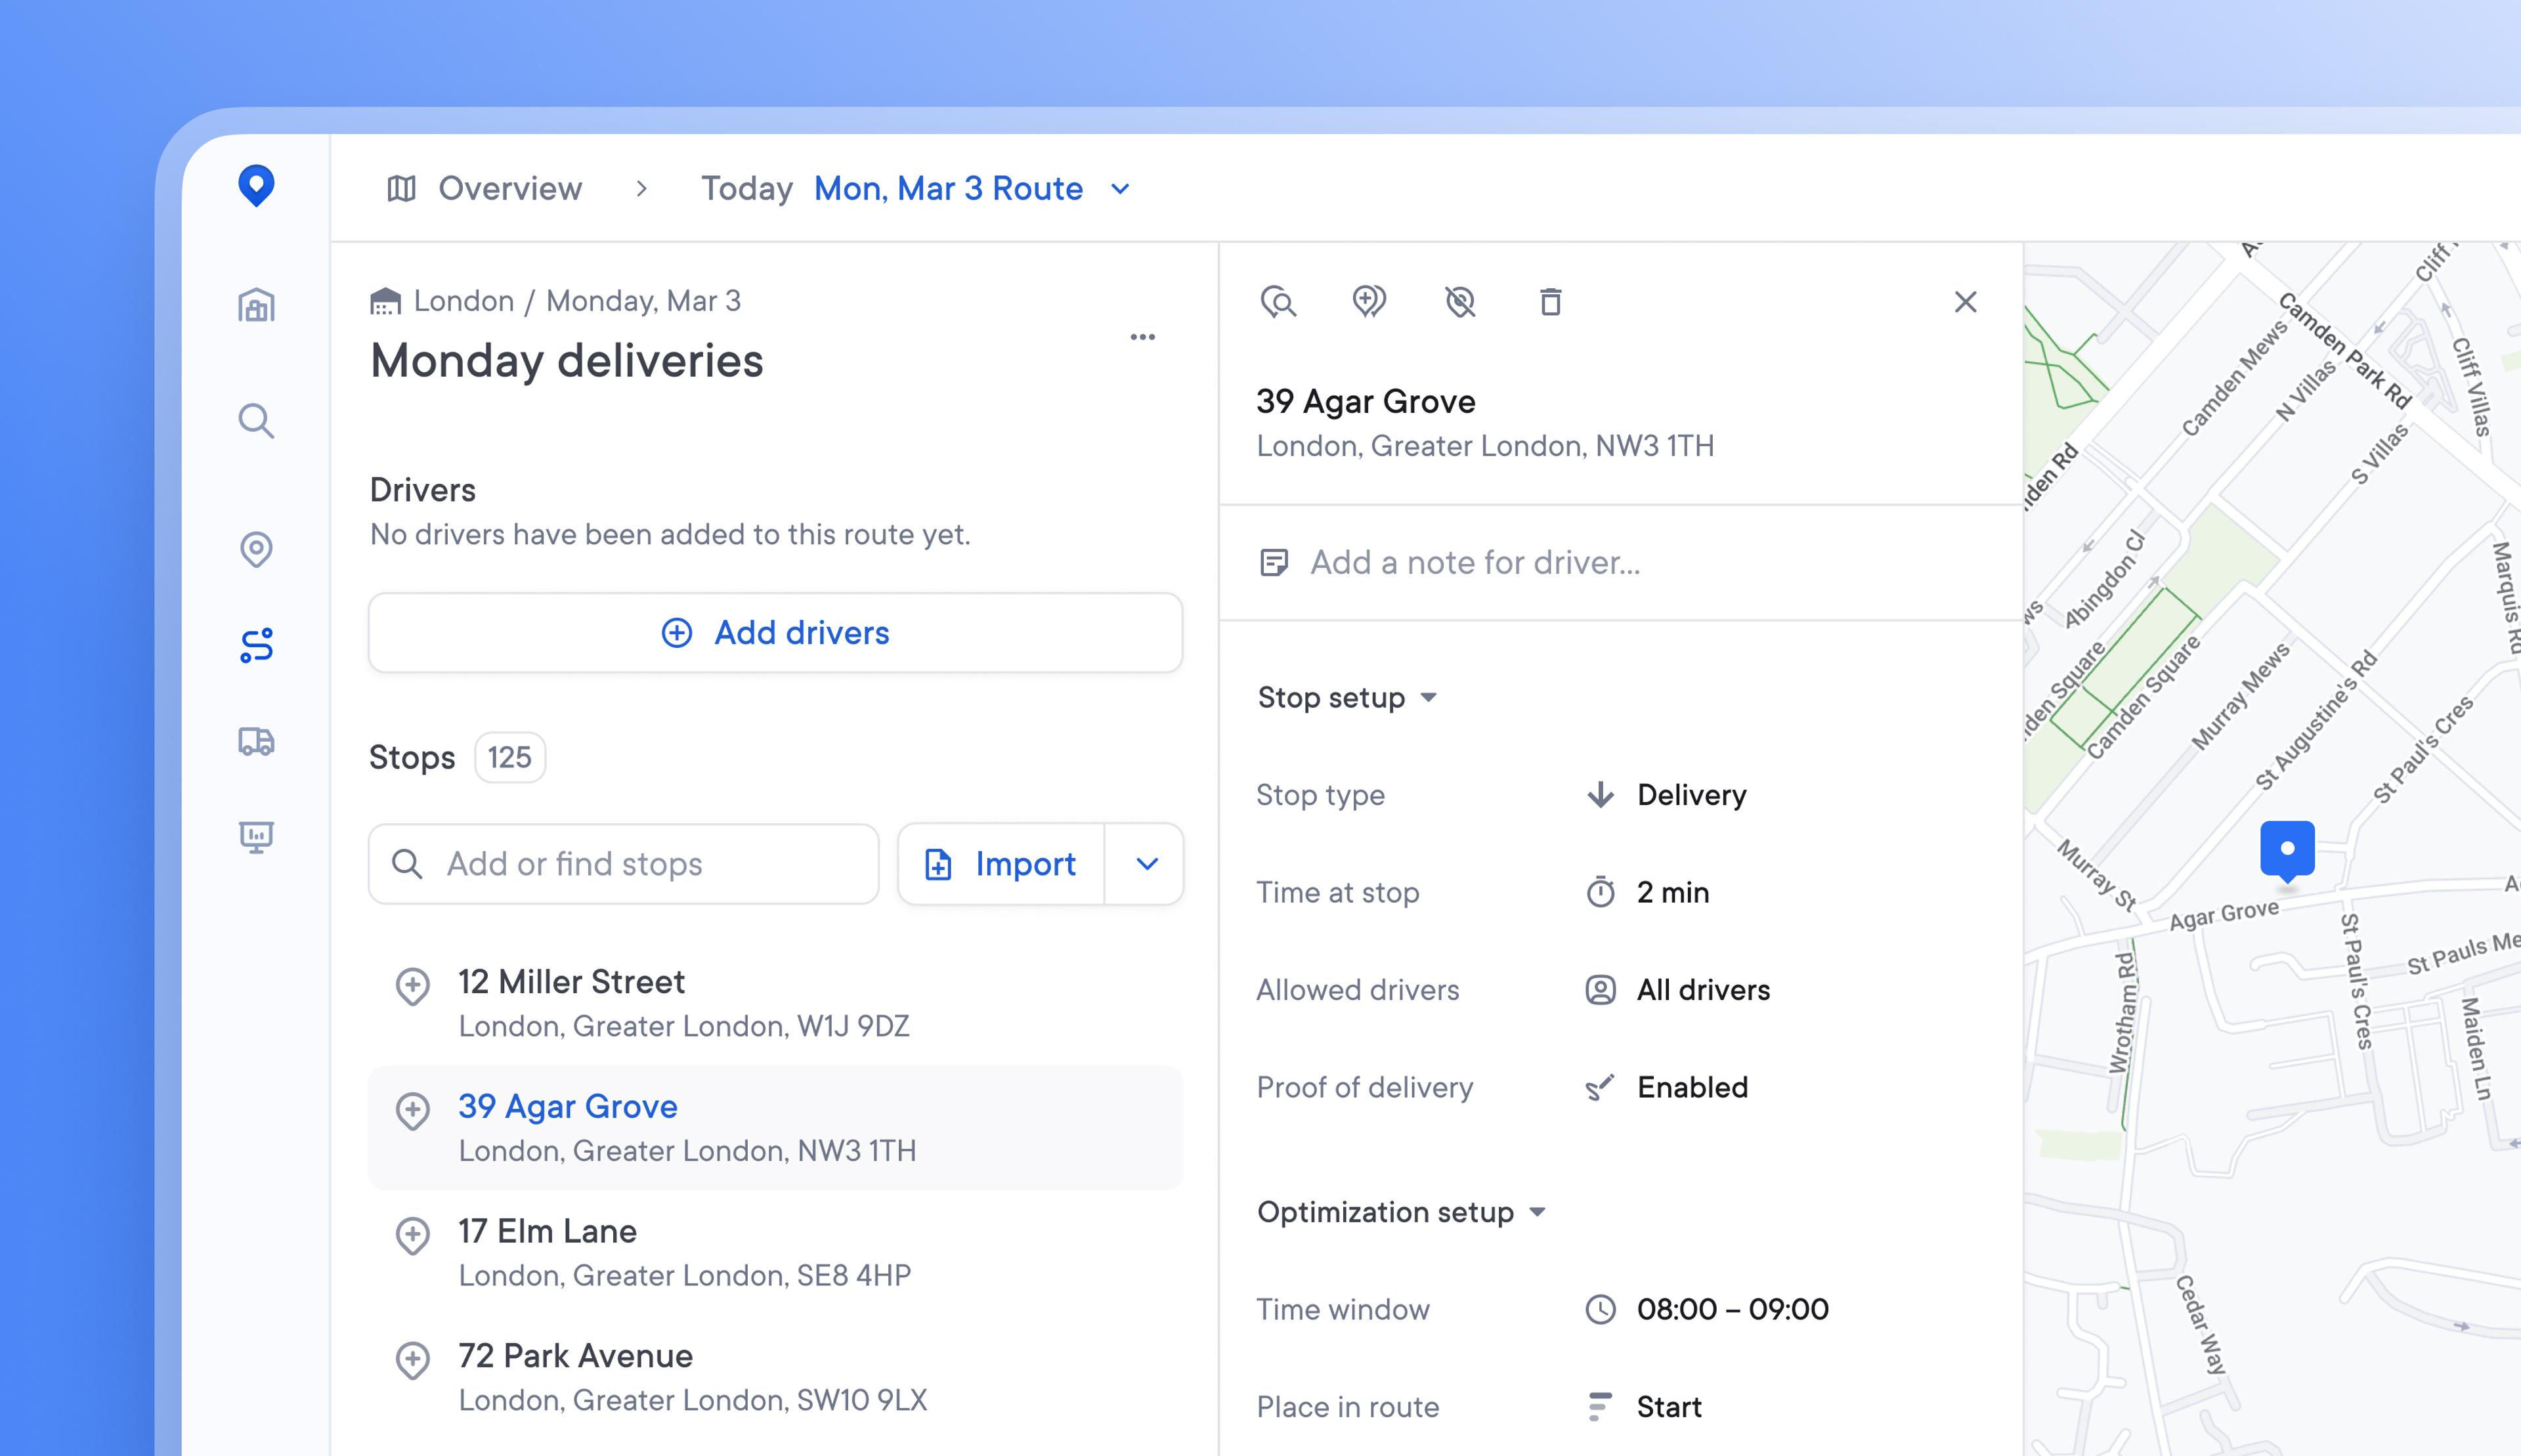
Discover and edit stop details more easily with our new stop details card
Editing stops on a route, in the client portal, or on the unassigned stops list was possible but not always easy. The level of detail associated with a stop can vary, and visualizing all stop details in a clear and usable design becomes difficult as the number of stop settings expands.
The redesigned stop details card, with its new streamlined design and tooltips for each element, makes it easy for users to discover all the stop editing actions available.
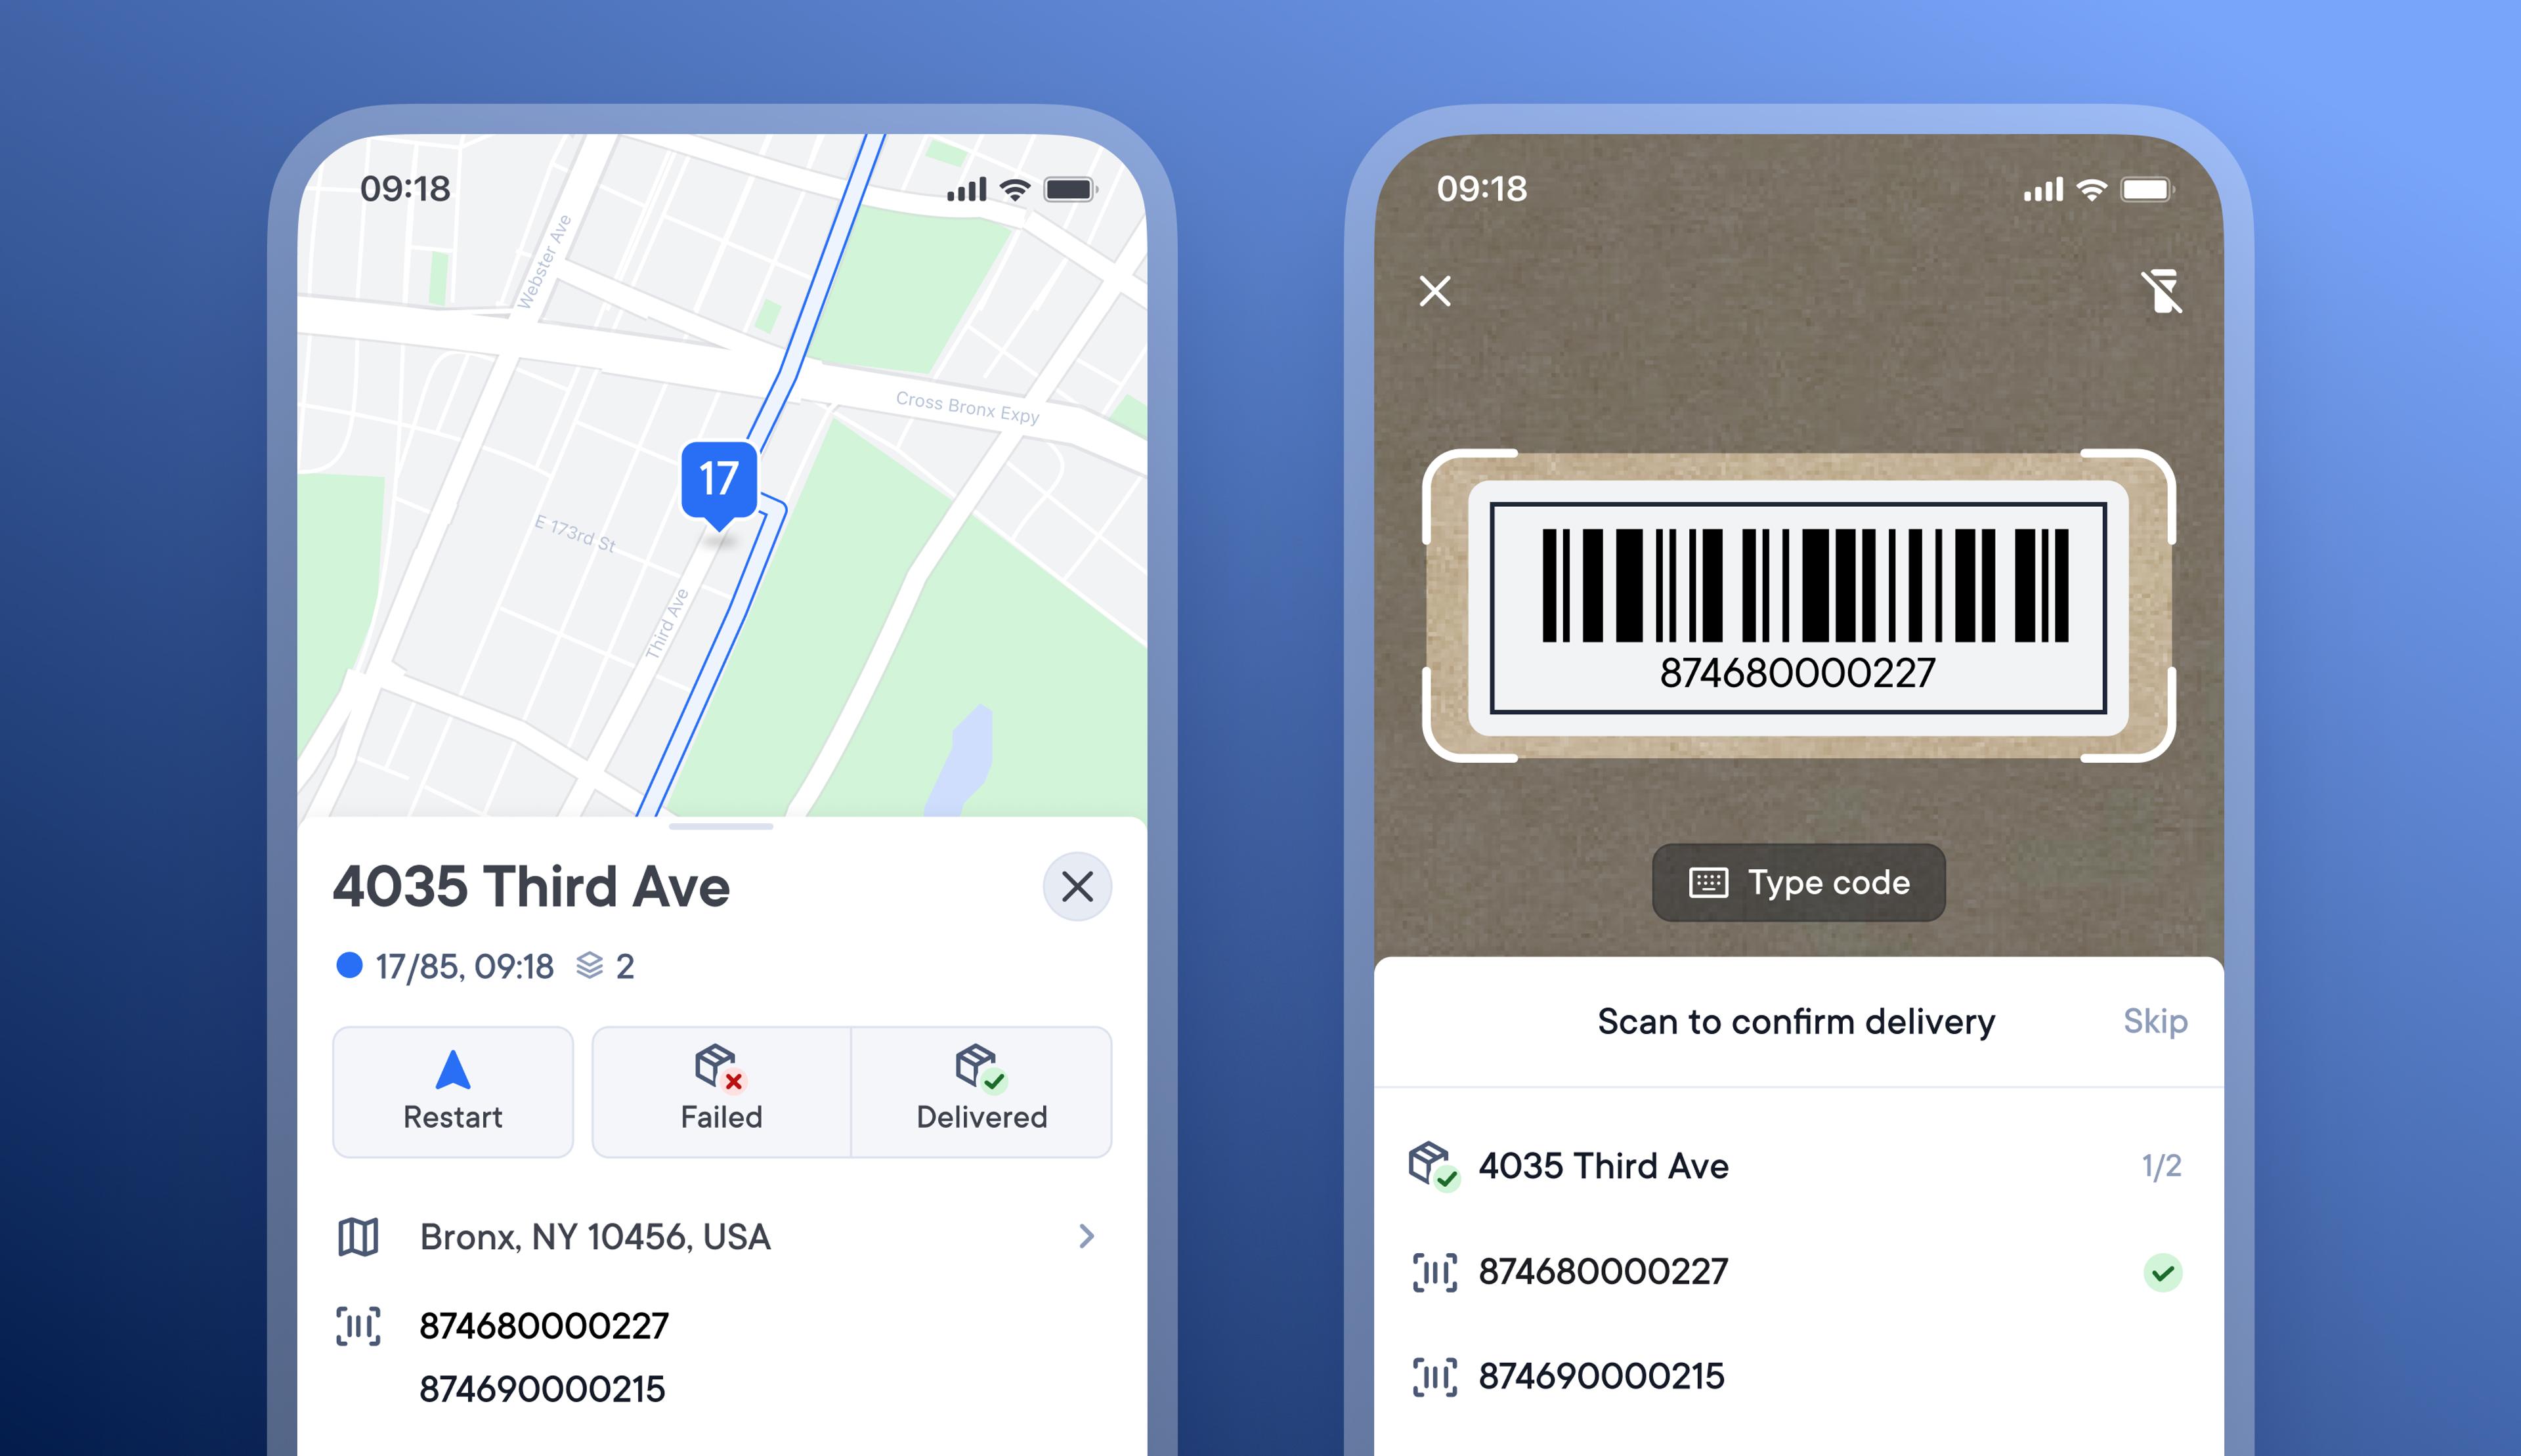
Increase correct item delivery with doorstep barcode scanning by drivers
Occasionally, Drivers mistakenly deliver the wrong package to an address. This can be a difficult and costly problem to resolve, as it impacts two recipients.
Dispatchers can now prevent this by importing stops with barcode IDs. When a driver arrives at a stop with an associated barcode ID, the driver can mark the stop as delivered and is now given the option to scan the package barcode to confirm the correct item was delivered.
This feature is enabled by default, but Dispatchers can disable it in their account settings so that it is not visible in the Driver app.
How Drivers can scan barcodes at the point of delivery
- Dispatchers import stops with barcode IDs into Circuit for Teams
- Drivers attempt a delivery and mark the stop as delivered
- If the stop has a barcode ID, the barcode scanning view will automatically open on the Driver app
- Drivers have the option to scan the package barcode to confirm the correct item for that address has been delivered or skip this step
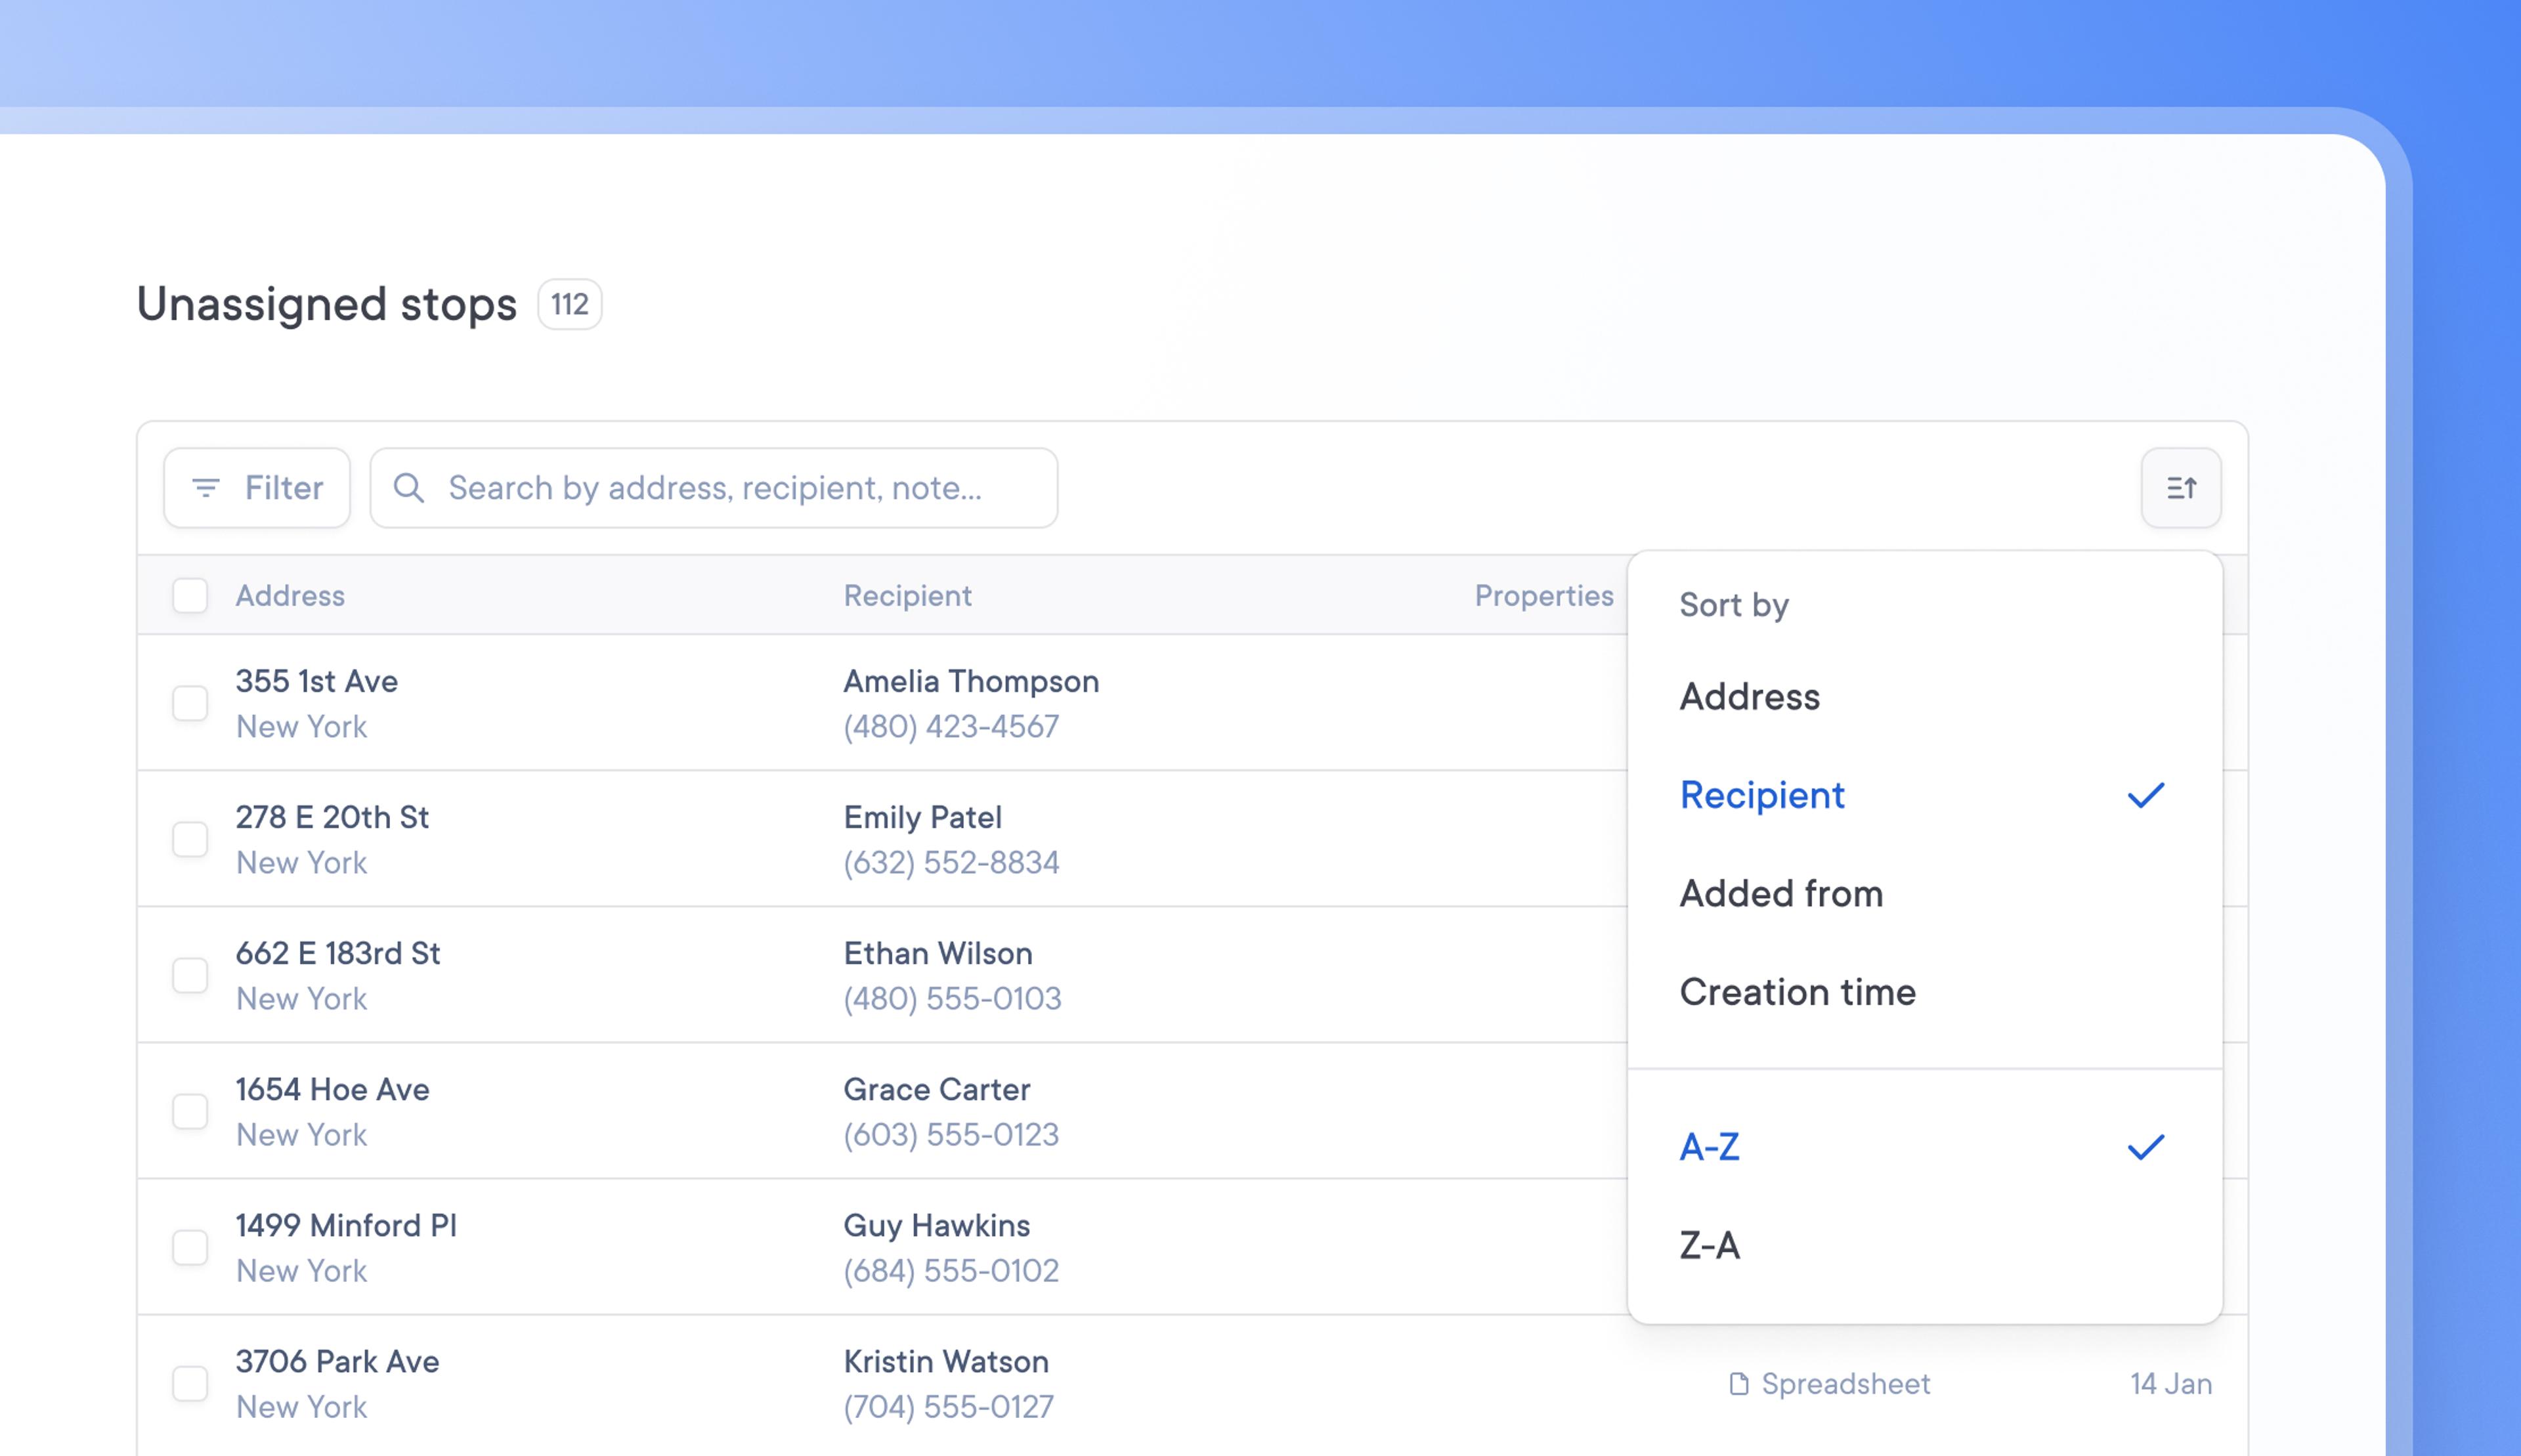
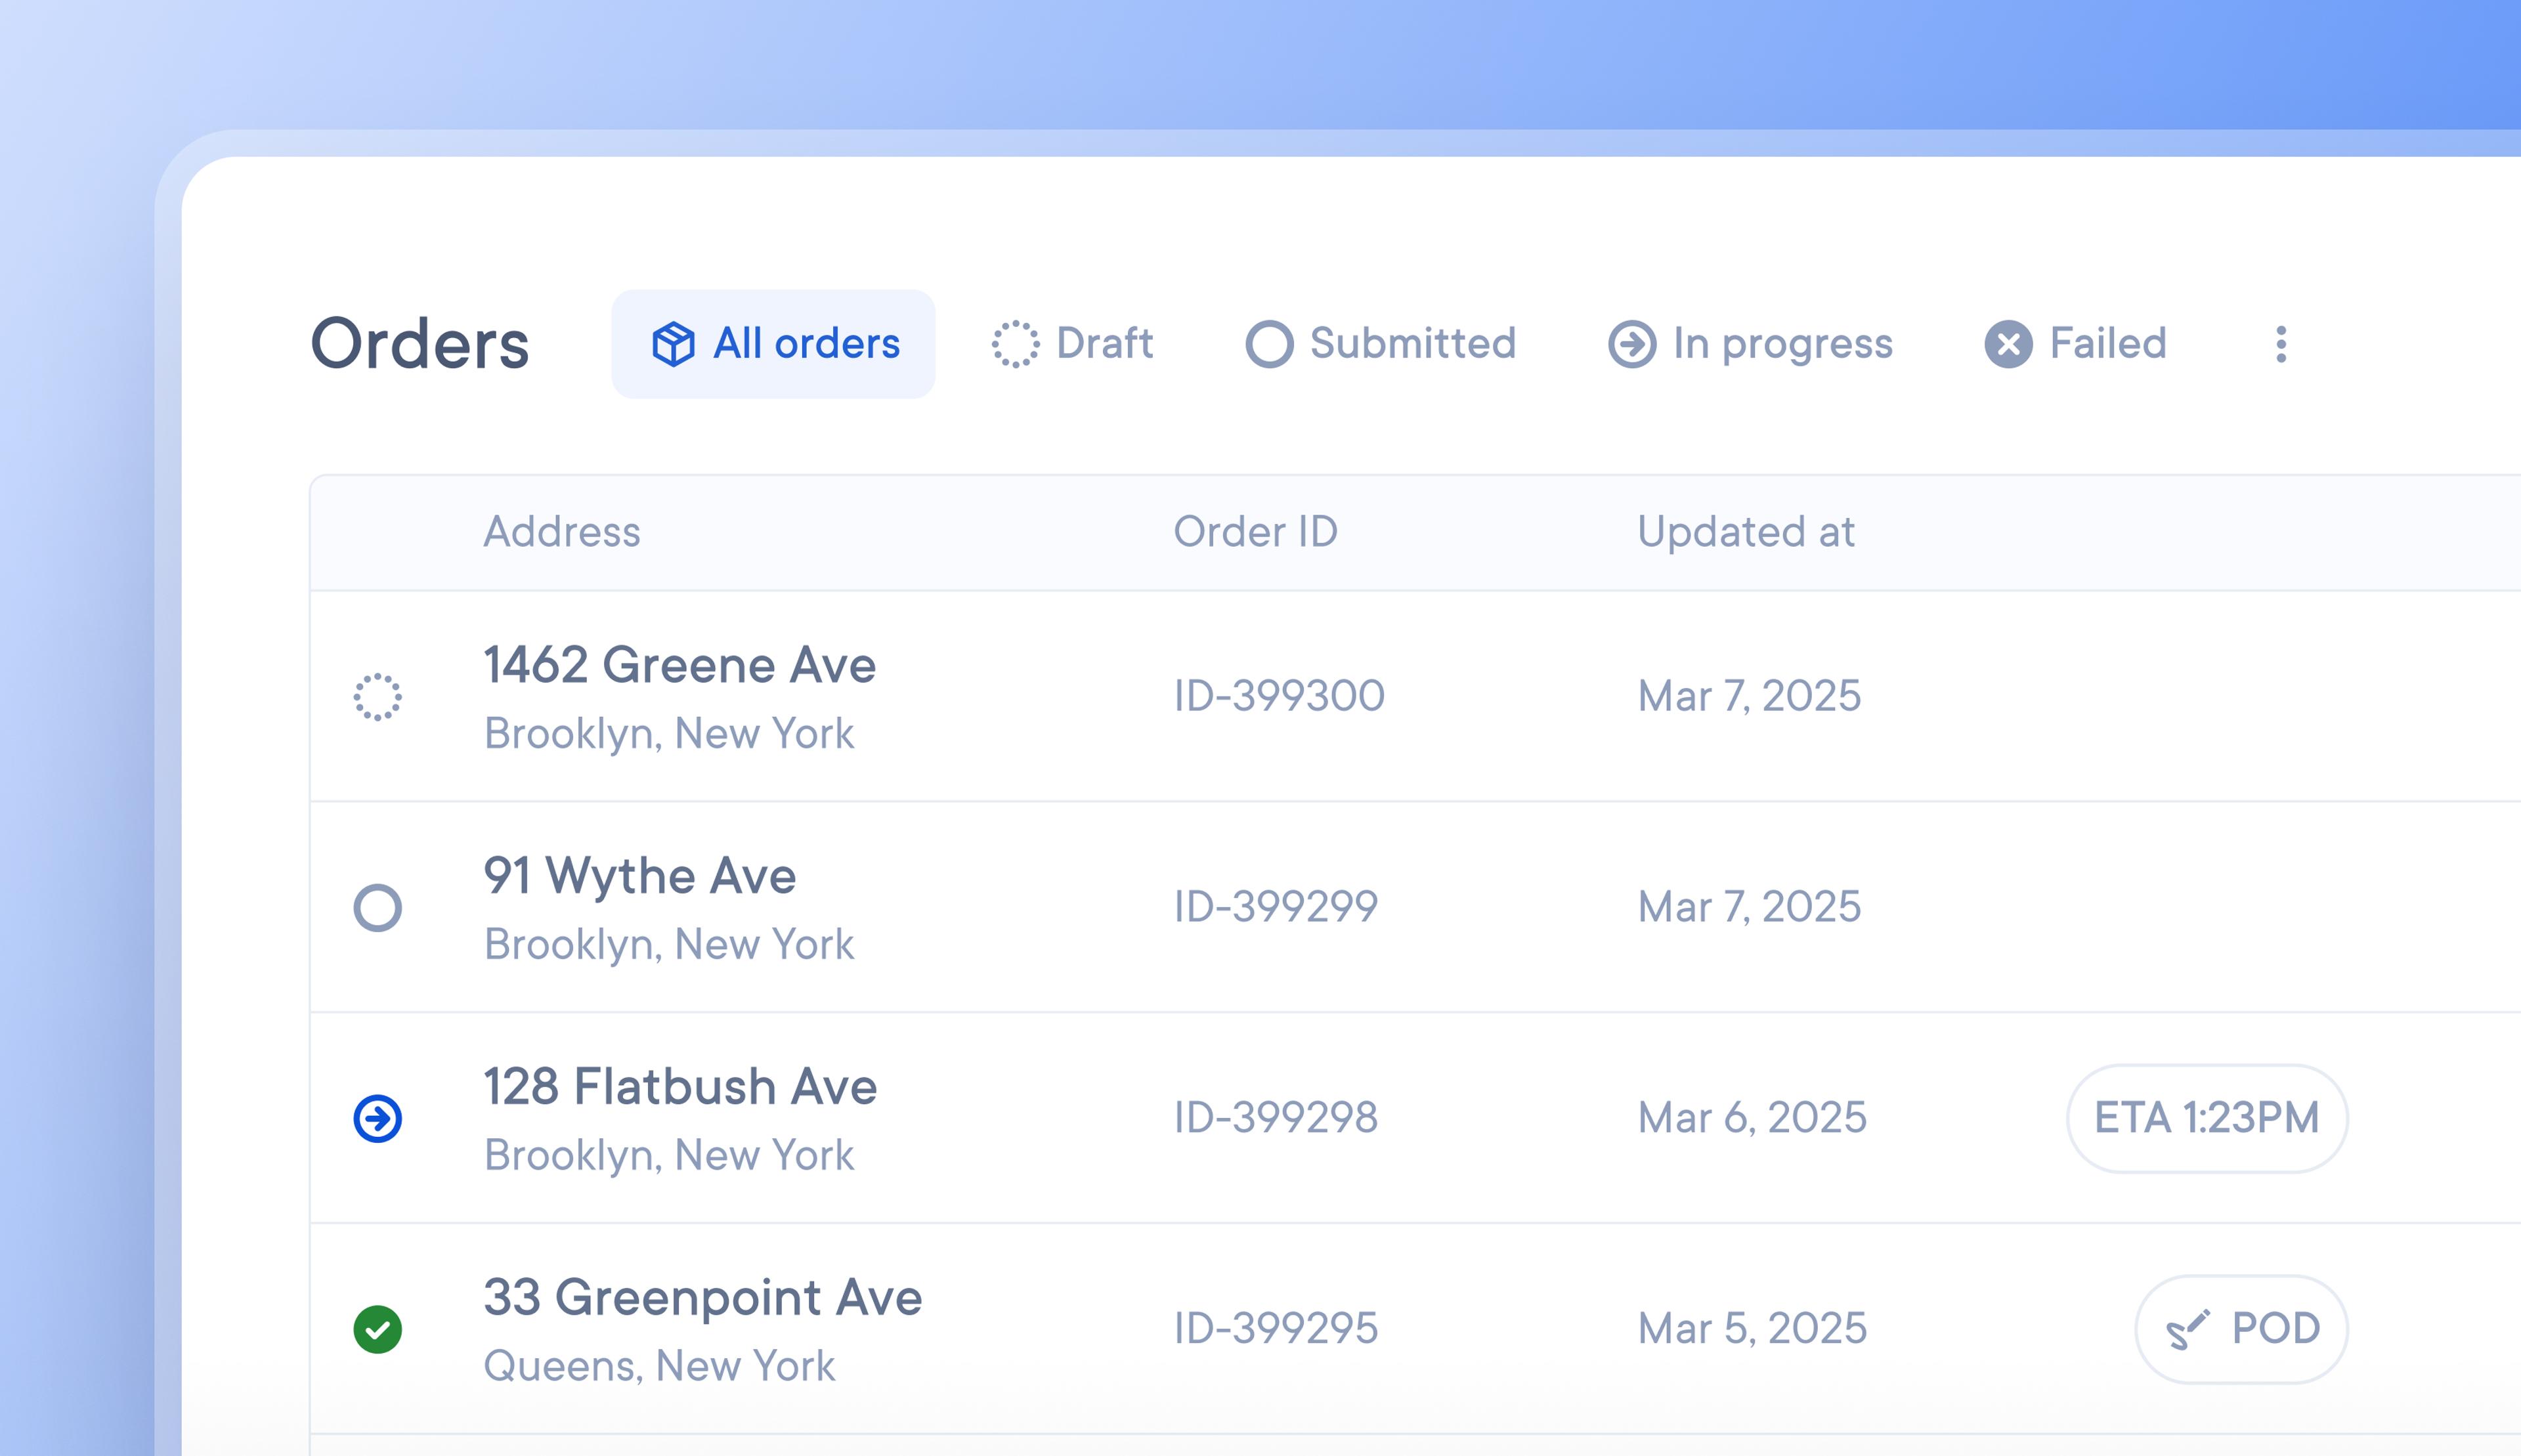
Easily find drivers, deliveries, and stops with sortable tables
When dealing with large tables of delivery data, it can be tricky and time-consuming to find a specific driver, delivery, or unassigned stop.
Now, tables can be sorted chronologically or alphabetically.
You can sort your data by clicking the sort icon in the top right corner of a table. Order information in a way that works best for your needs, and find the information you’re looking for faster.
How to sort tables
- Drivers, Unassigned stops, and Client portal tables can be sorted
- Go to the table > Click the sort icon in the top right corner
- Choose the field you want to sort your table data by eg Name
- Select the order you want that field sorted in eg A-Z or Z-A