Product updates
What’s new in Circuit for Teams
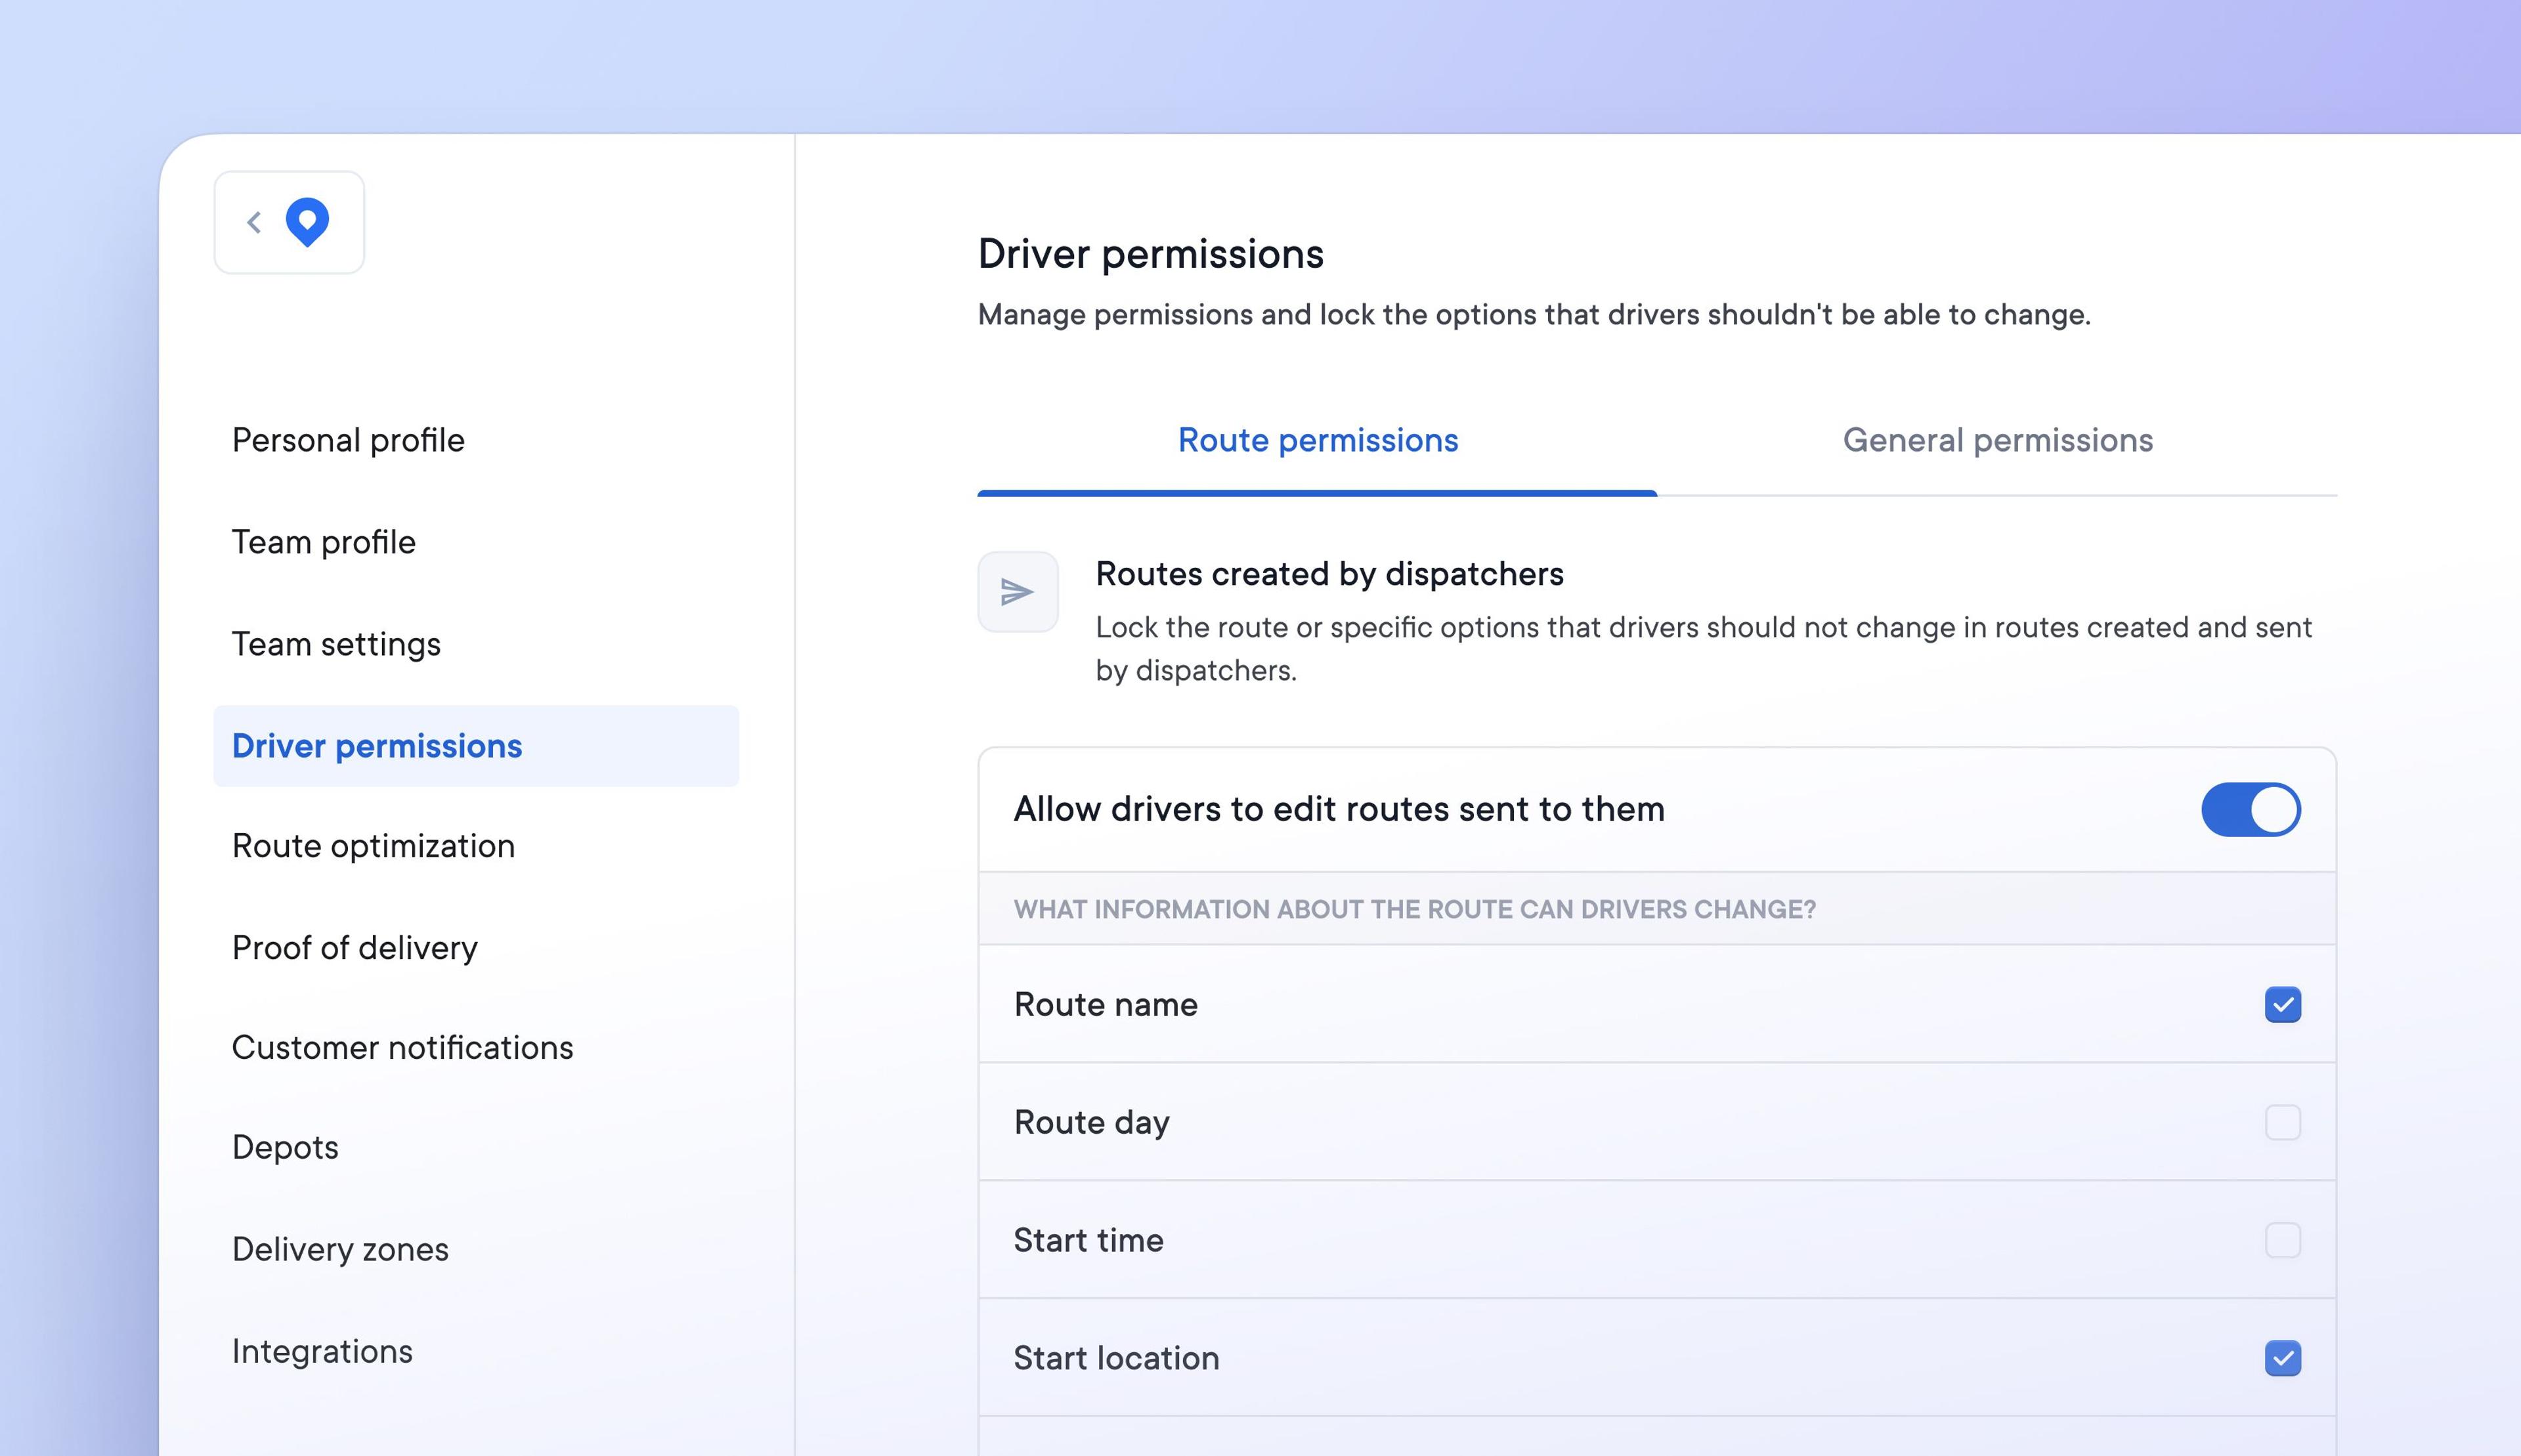
Allow drivers to edit specific route settings with customized permissions
Previously there were no restrictions on a driver’s ability to make changes to routes. If changes were not communicated to dispatchers or had an unforeseen knock-on effect, this could cause problems.
It’s now possible to specify which aspects of a route drivers can edit by setting specific driver route permissions. Manage what drivers can and cannot do in order to suit your delivery process.
How to set driver route permissions:
- Go to Settings > Driver permissions > Route permissions
- Toggle permissions to on/off
- Tick each specific setting to enable it for your drivers
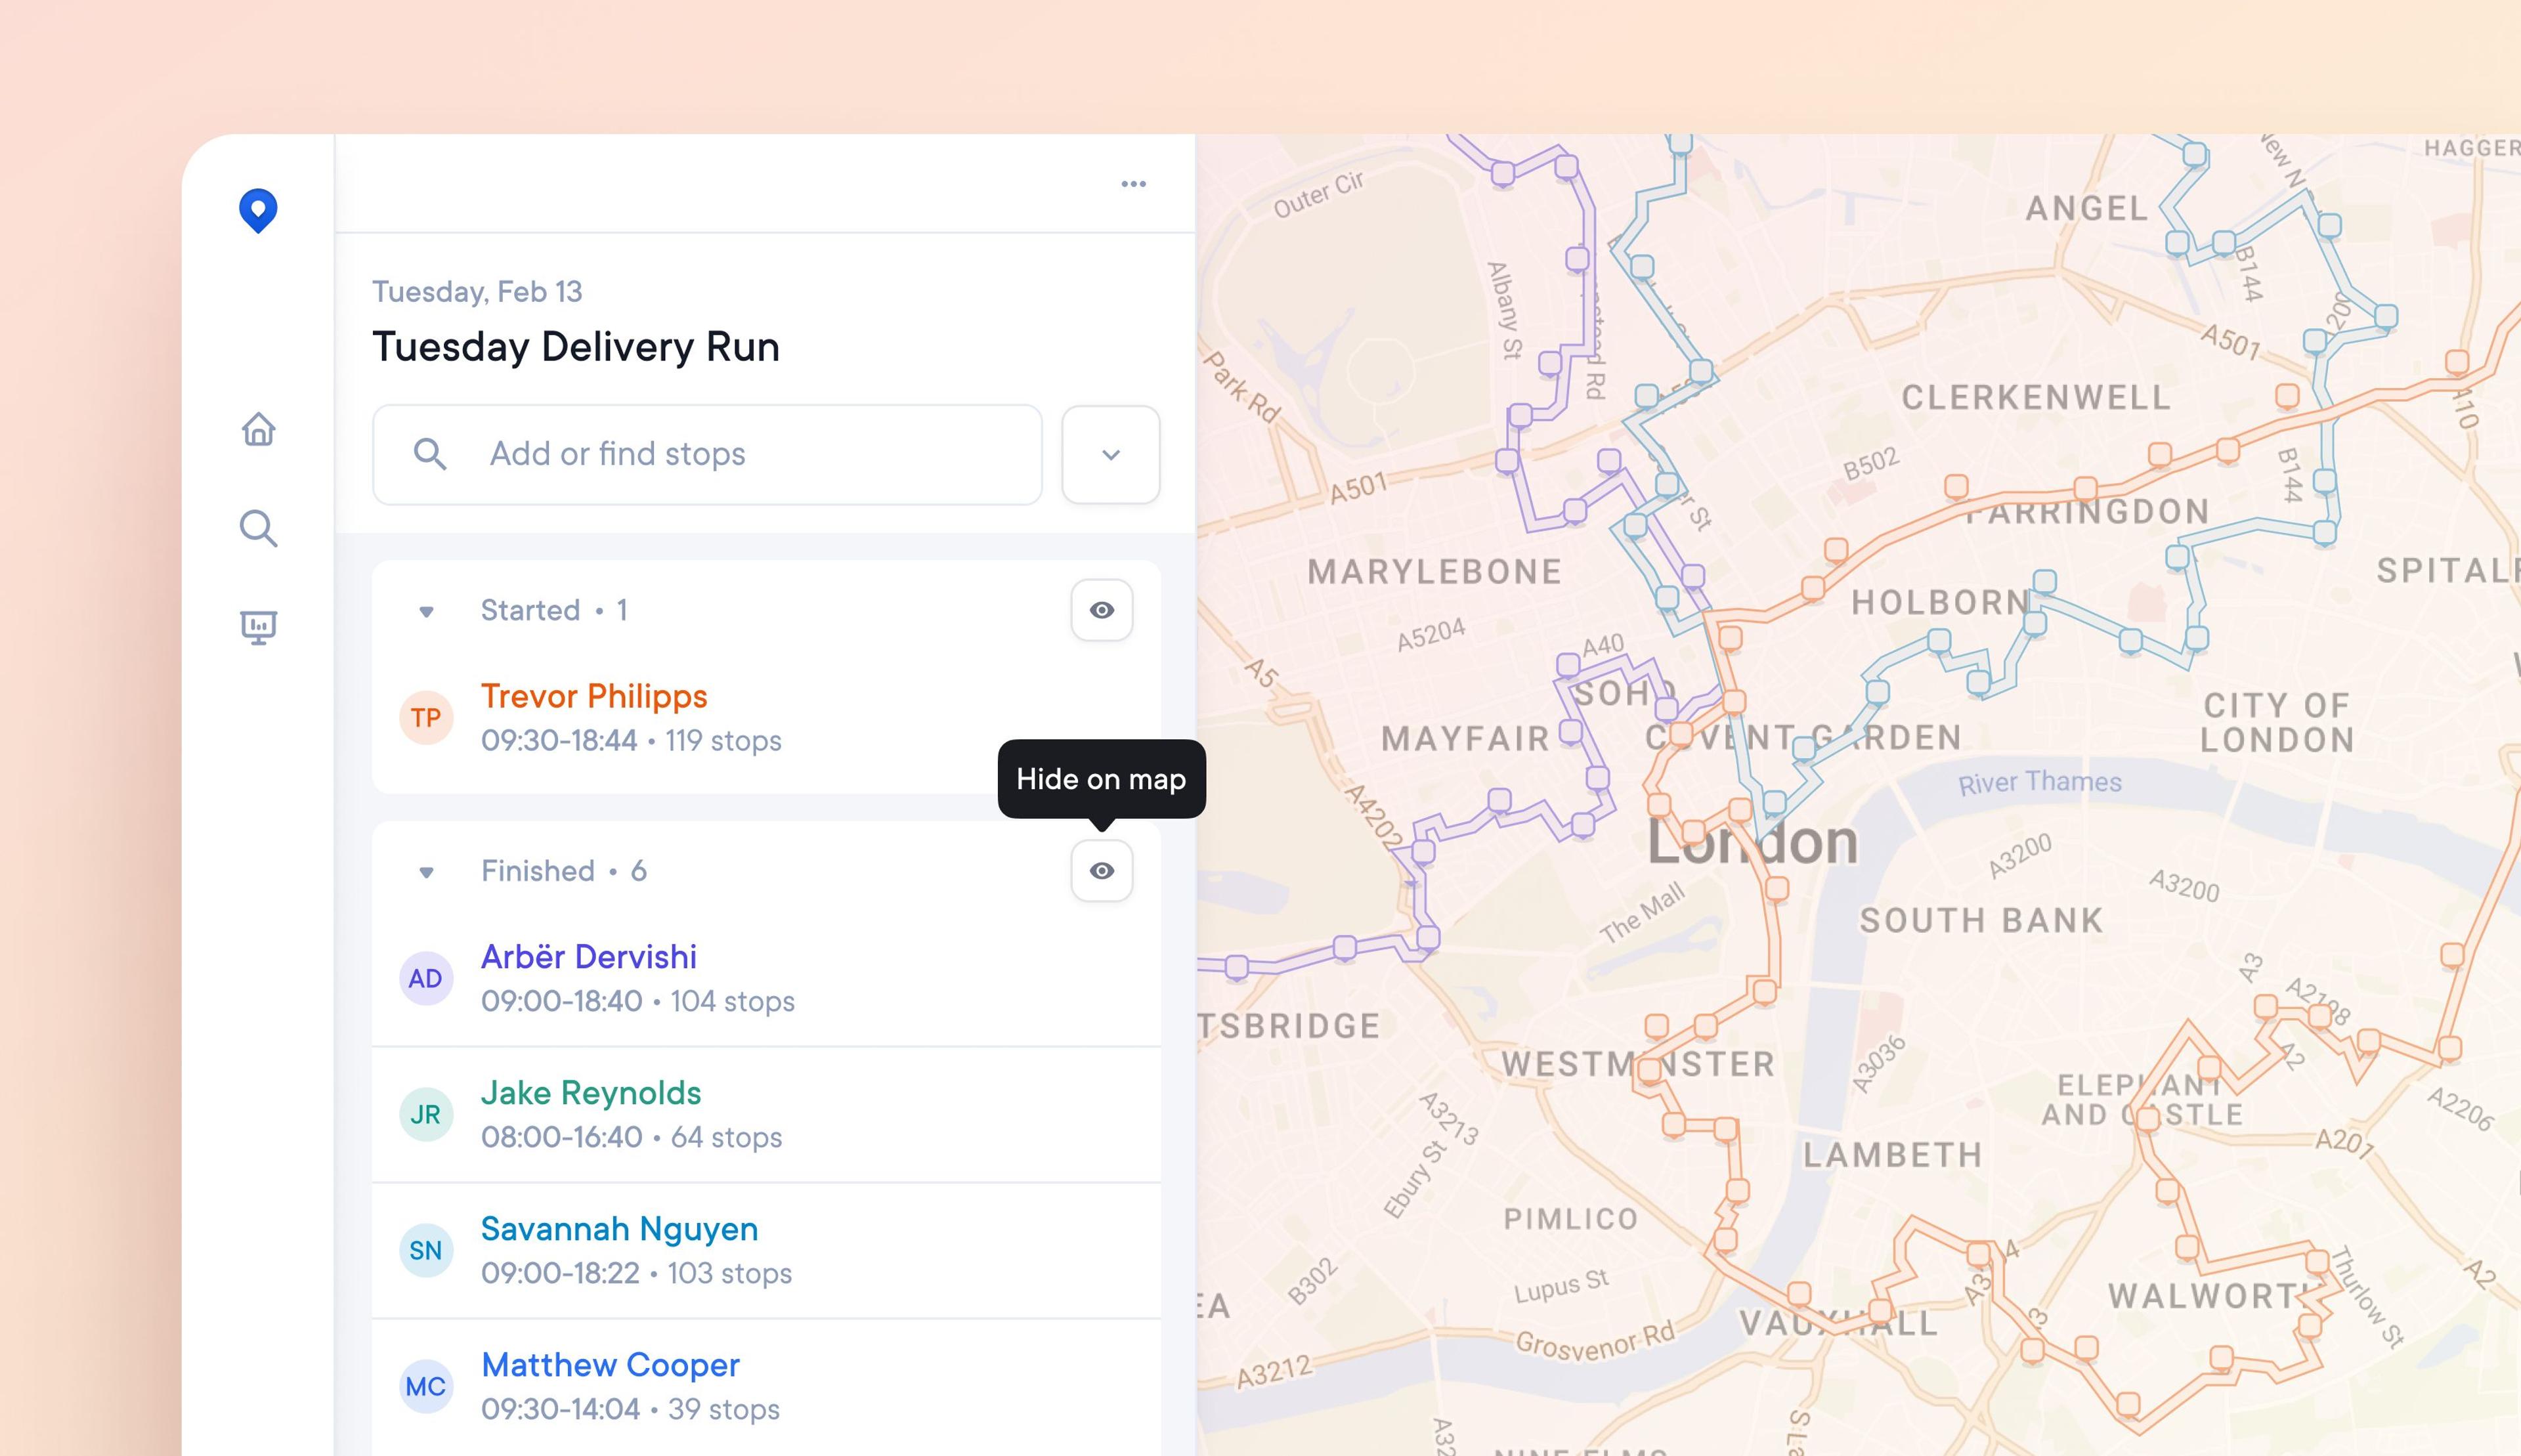
Select which routes appear on the daily overview map
Days with many routes in the same location can create a cluttered and hard-to-read map view.
Now, you can toggle on and off which routes appear on the map for a more streamlined view. For example, you can toggle off finished routes as the day progresses to view only the active routes.
How to toggle routes on/off the map view:
- On the daily overview sidebar routes are grouped by status eg not started, started, finished
- Next to each group of routes is an eye icon
- Click the eye icon to remove that group of routes from the map
- Click the eye icon again to restore those routes to the map
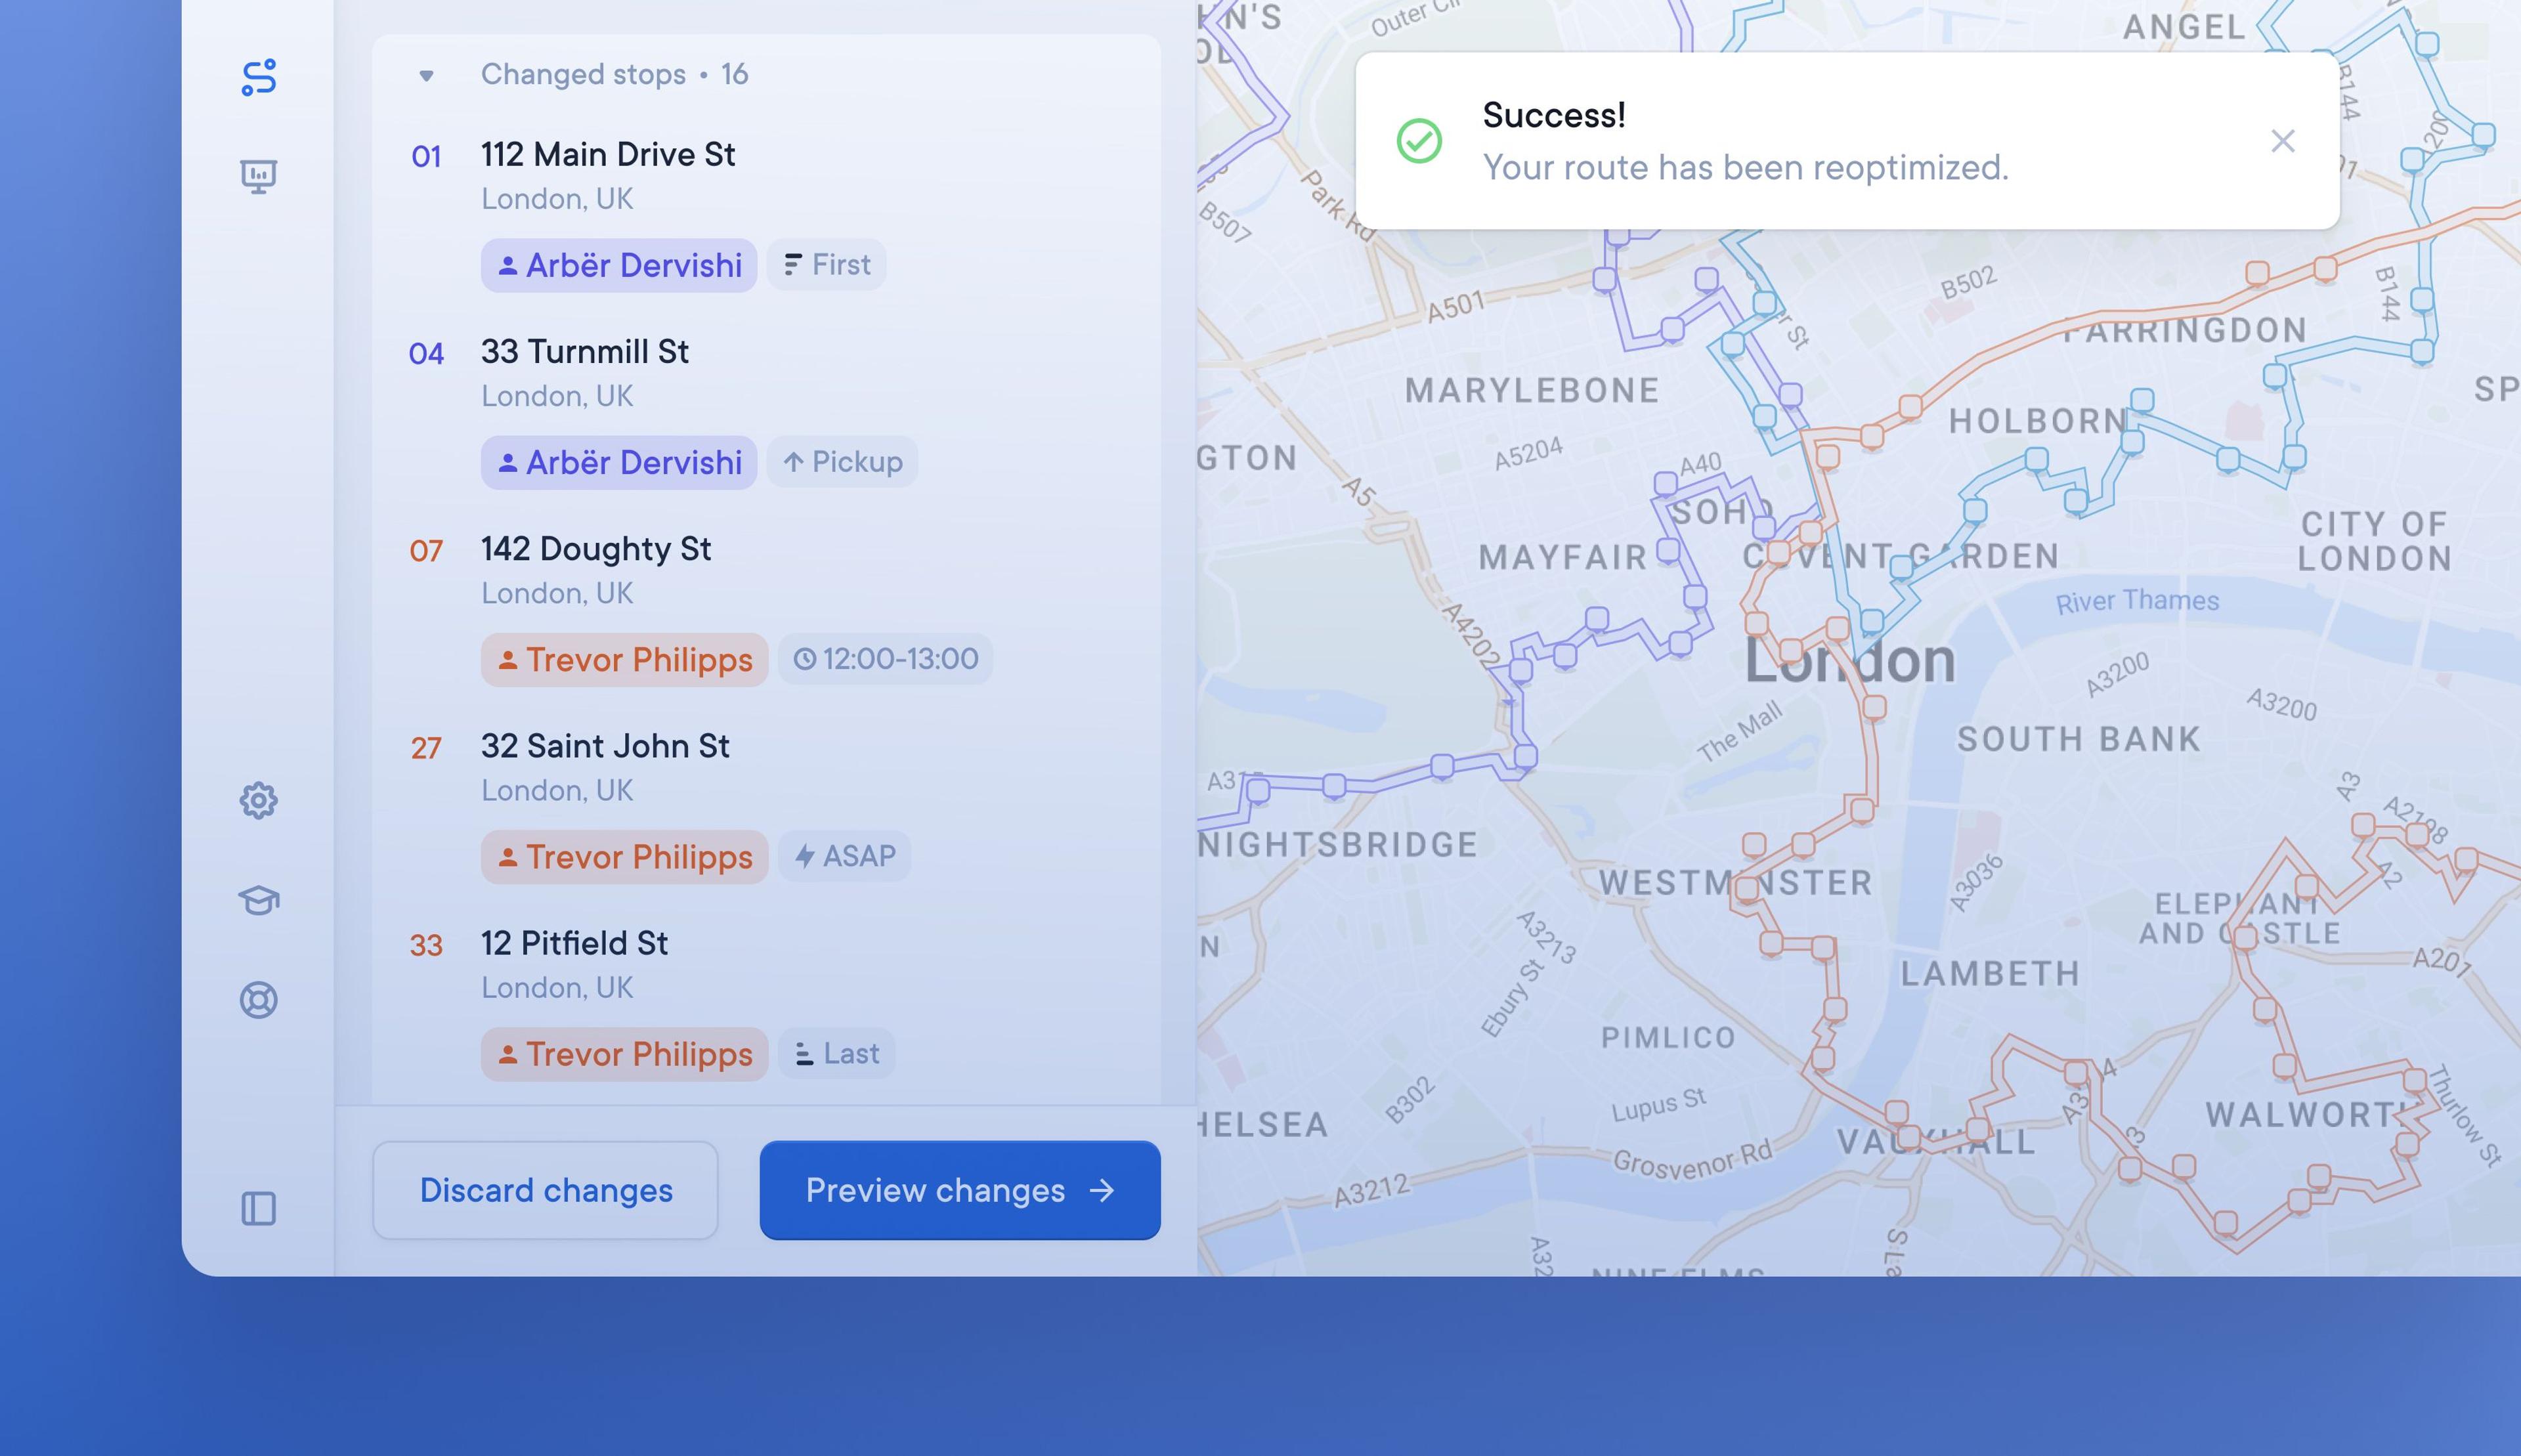
Faster processing of changes to routes
Minor changes to existing routes previously took a few minutes to reoptimize, which slowed down dispatchers.
A significant increase in processing speed has reduced the amount of time it takes for edited routes to be recalculated. Modified routes can now be reoptimized up to 10 times faster.
What's new? - Product updates
Watch our latest product update video and discover more about the following features:
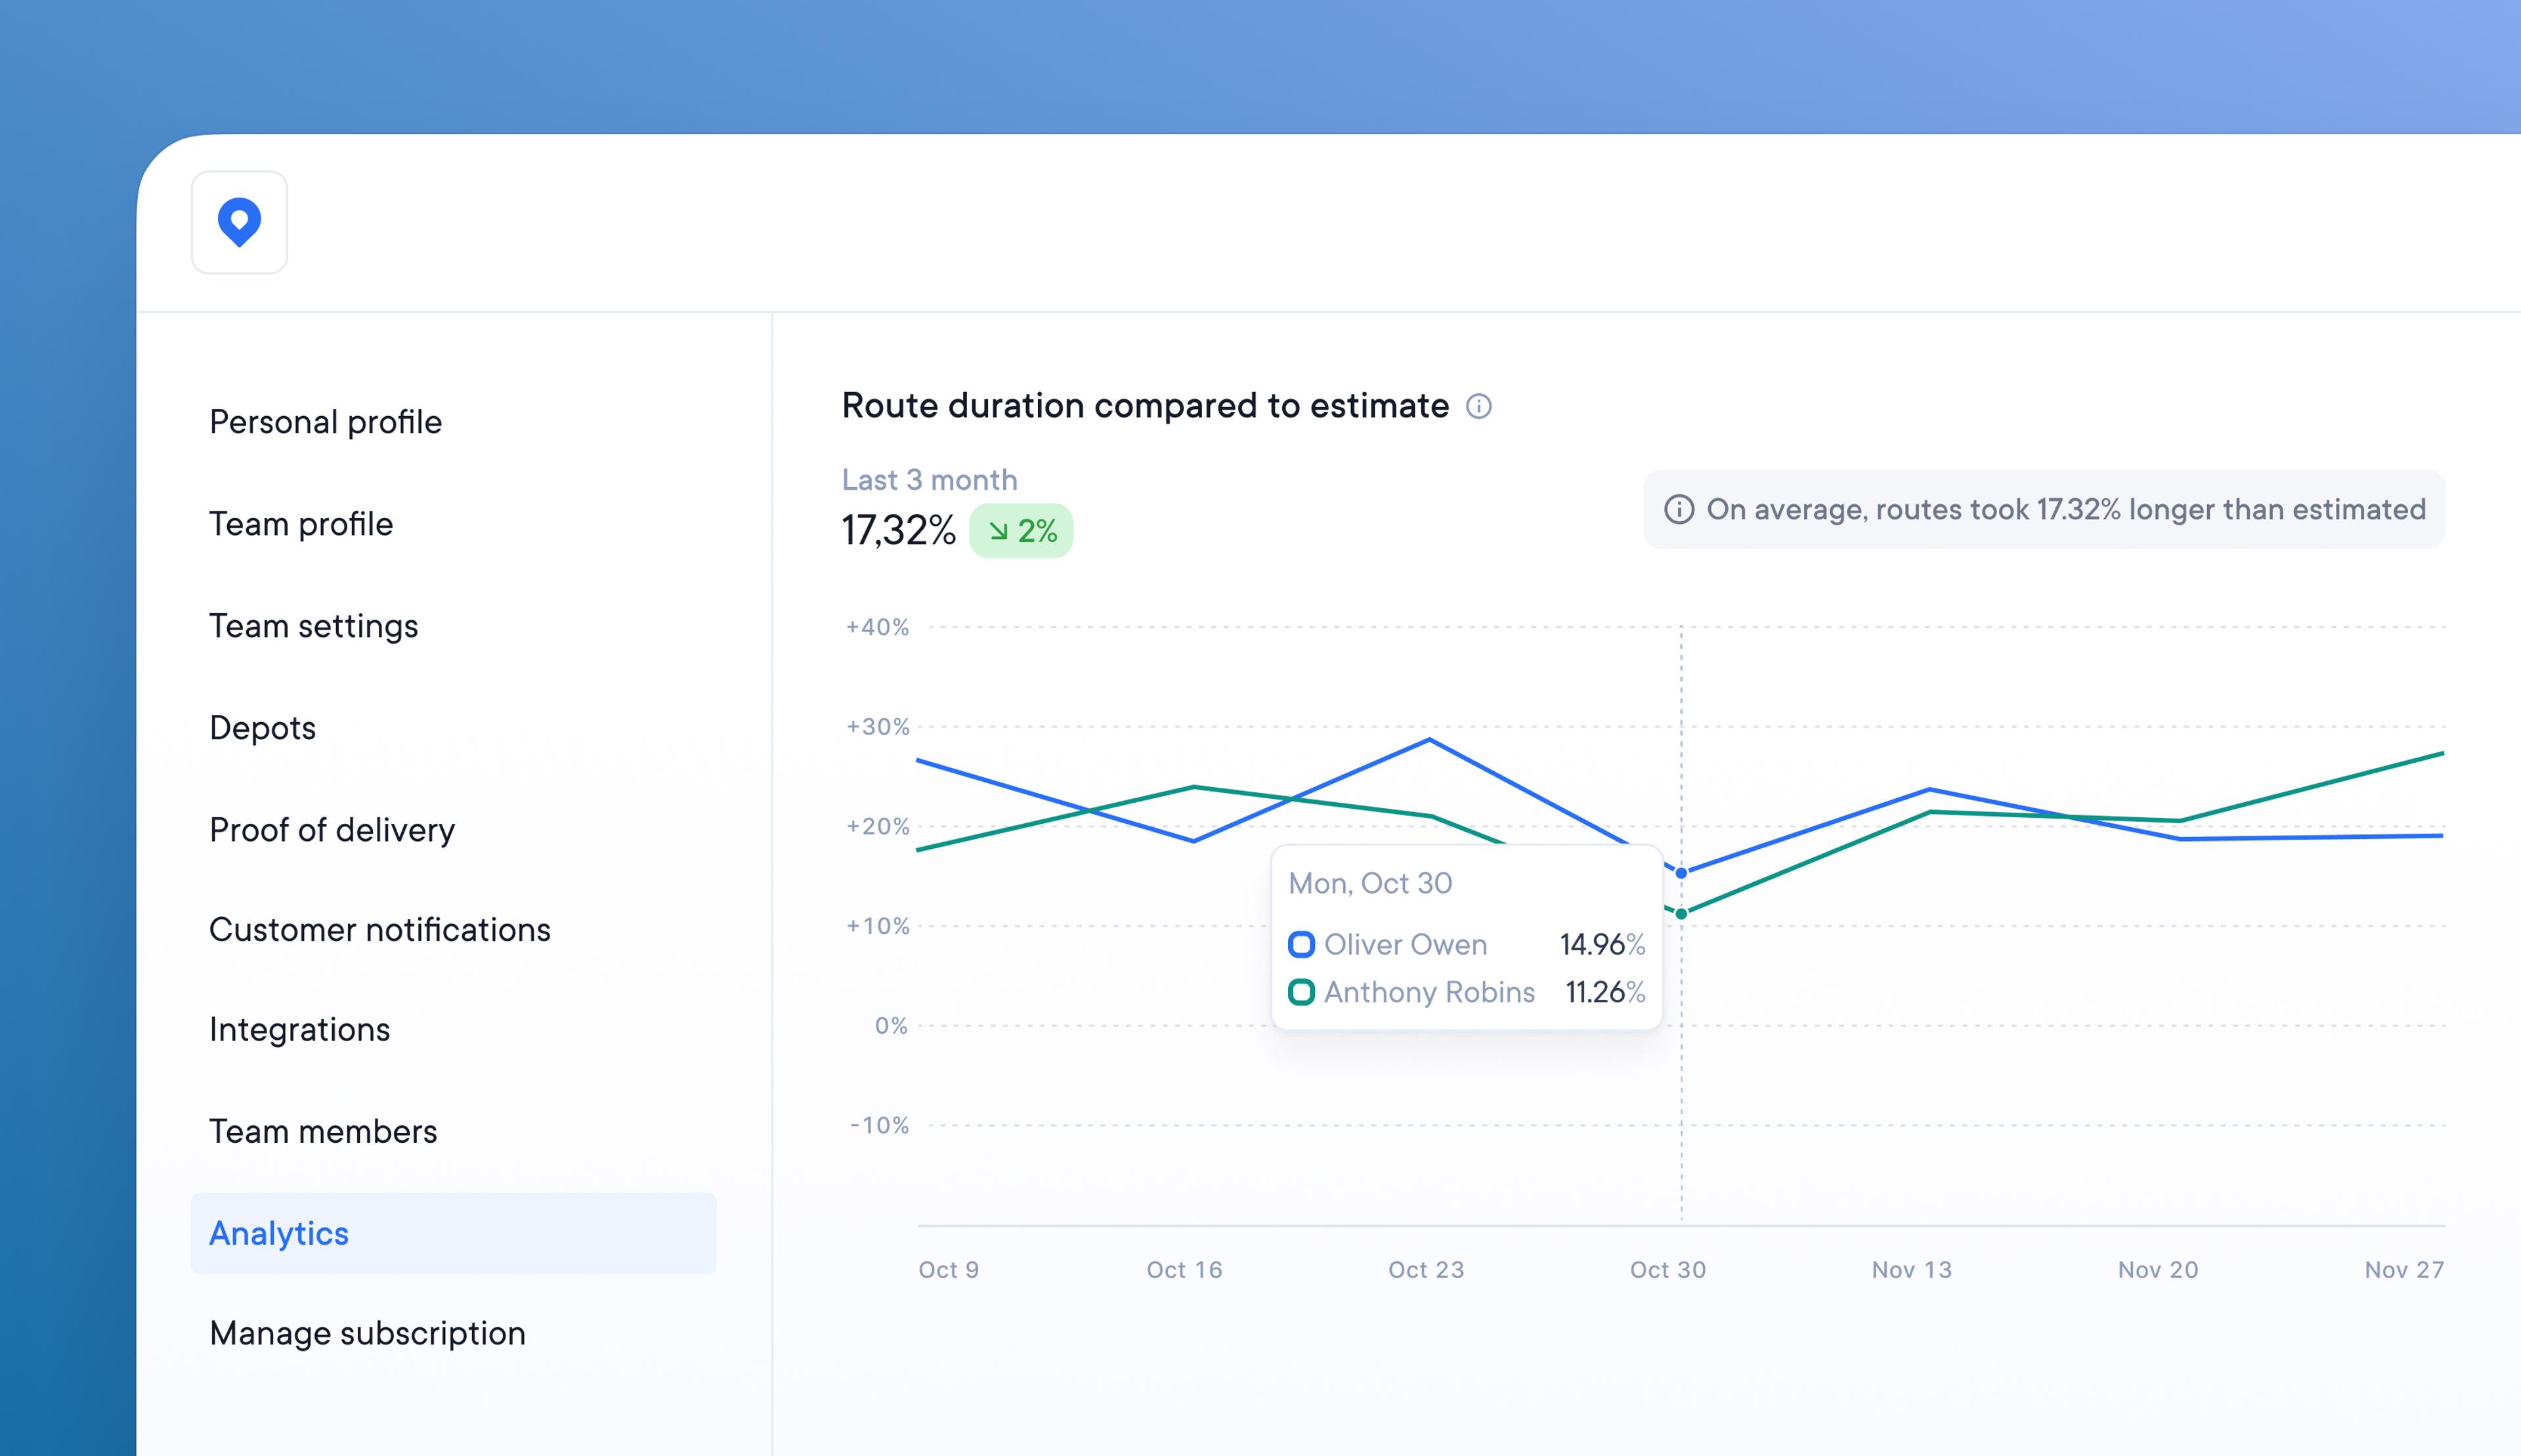
Compare the difference between estimated and actual route duration
Understanding how long routes should take your drivers helps determine capacity and manage daily workflow.
Using the most recent analytics report, compare the actual route duration time with the average route duration time.
Find out how much the average and estimated duration differ. Examine performance factors and make changes to improve these values.
How to compare estimated and actual route duration:
- Go to Settings > Analytics
- Run the ‘Route duration compared to estimate’ report
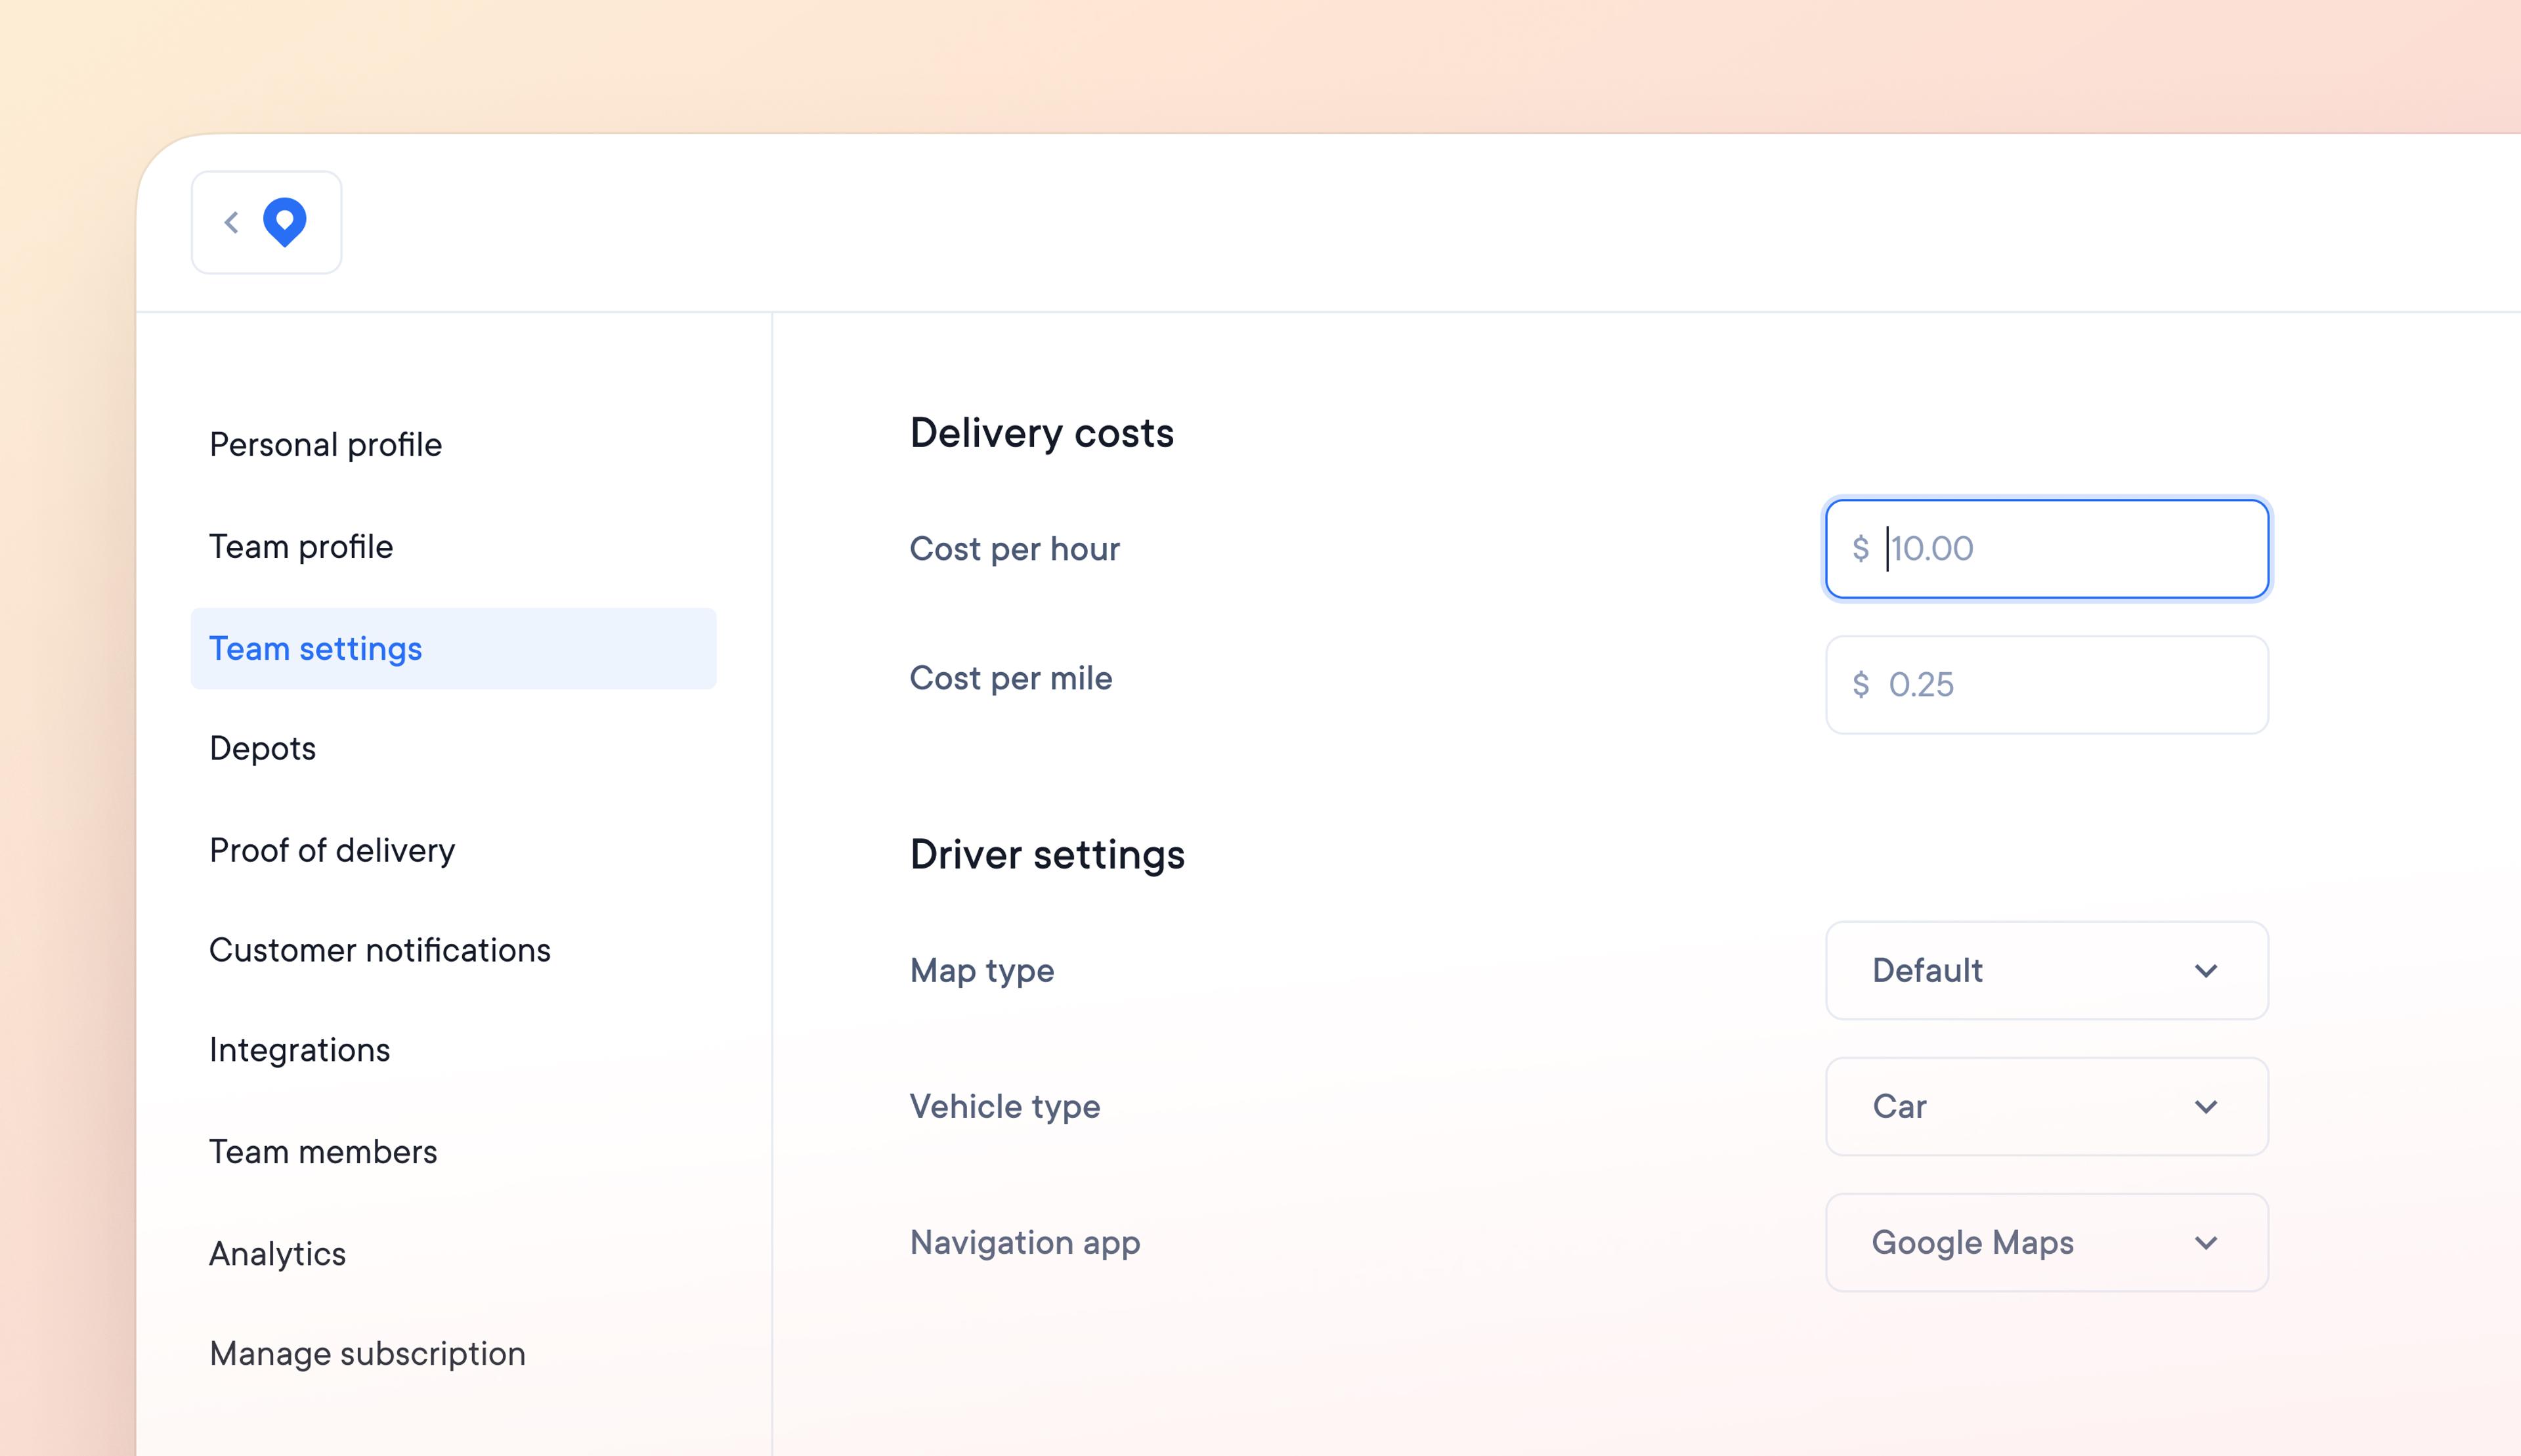
Set a unique cost per delivery to track operational expenses accurately
Knowing if you are achieving good business margins on delivery operations is difficult because there are so many variables.
Now, you can set a custom cost per delivery, taking into account the cost per hour and cost per mile.
Create a cost per delivery that accurately reflects your business expenses and stay on top of outgoings.
How to set a custom cost per delivery
- Go to Settings > Team settings
- Add your specific delivery costs per hour/mile
- Go to Settings > Analytics to see your cost per delivery report over time
Set a maximum number of stops per driver according to vehicle capacity
Not being able to set a maximum number of stops per driver per route can lead to dispatchers having to edit routes manually. Moving stops between drivers to ensure those with the right vehicle capacity receive the correct number of deliveries is tricky and time-consuming.
The ability to set a maximum number of stops per driver per route is possible in two ways.
How to set a default maximum number of stops per driver:
- Go to Settings > Depot
- Click on a depot to edit it
- Add a maximum number of stops per driver per route
- This number will apply to all drivers associated with that depot
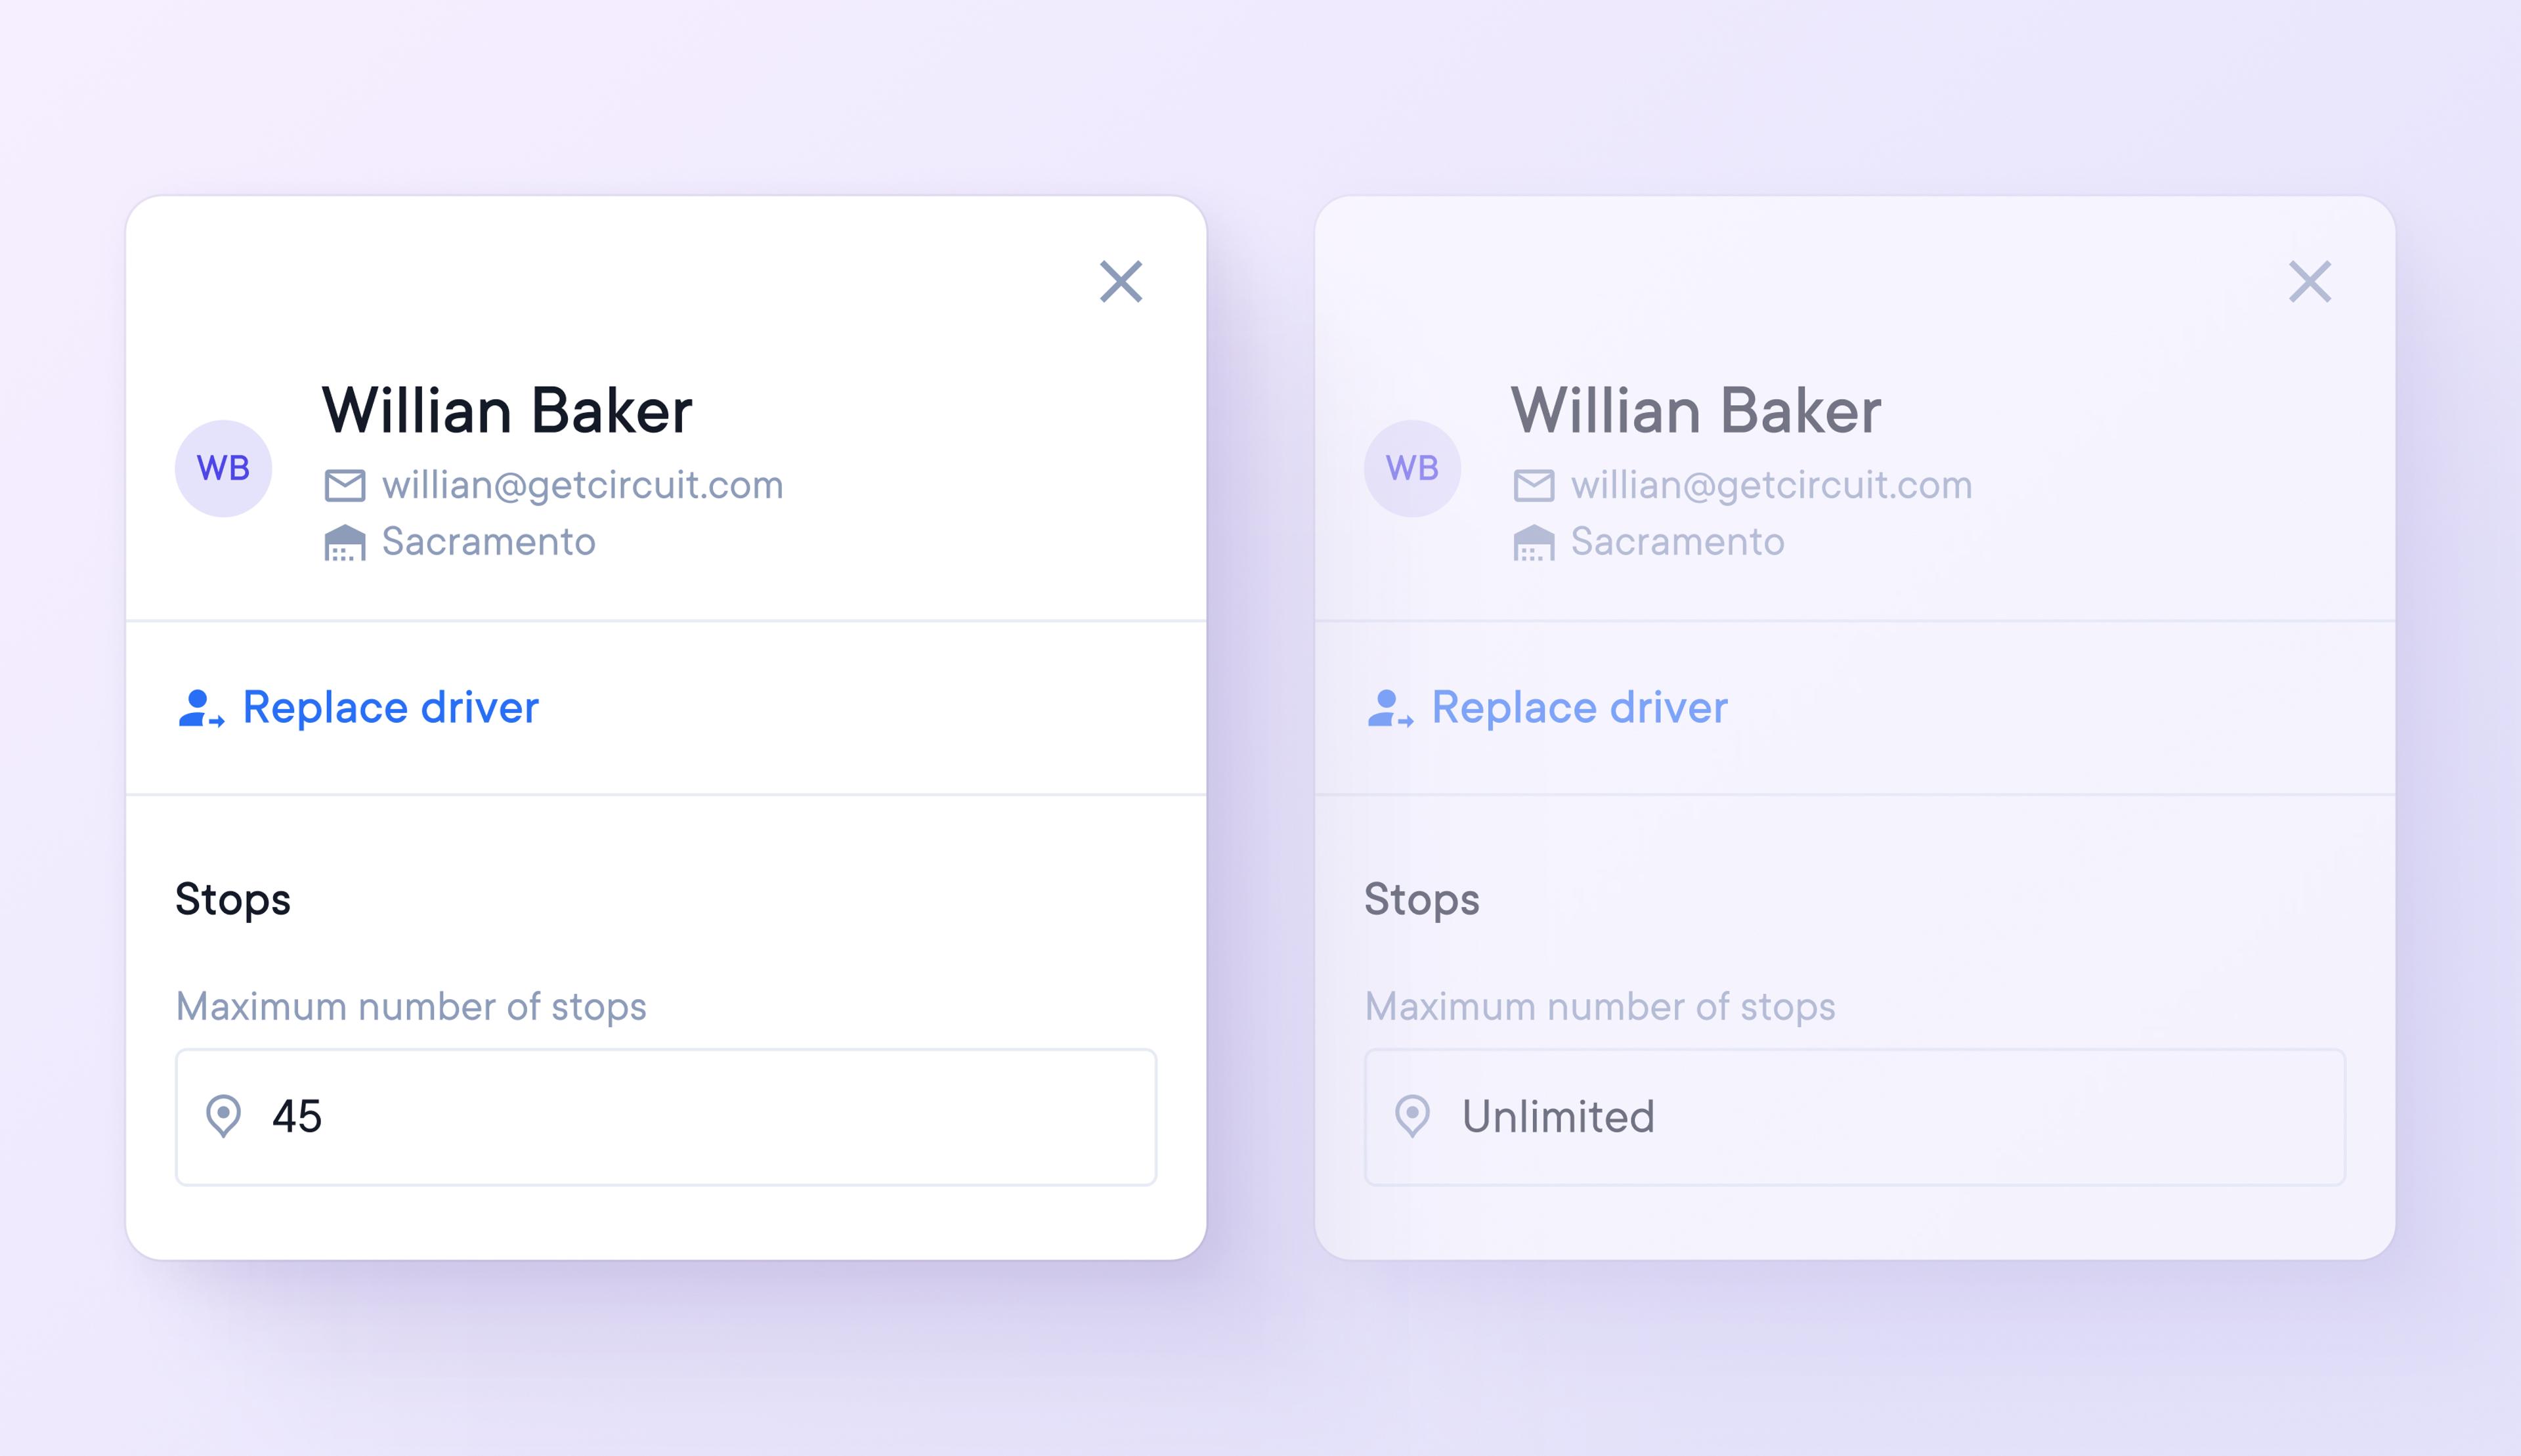
How to set a custom maximum number of stops per driver:
- Go to Settings > Team members
- Click on a team member to edit them
- Click on the tab > Route overrides
- Click the Maximum number of stops button to off
- Enter a custom maximum stop number for that individual driver
- This setting will override all other settings for this specific driver
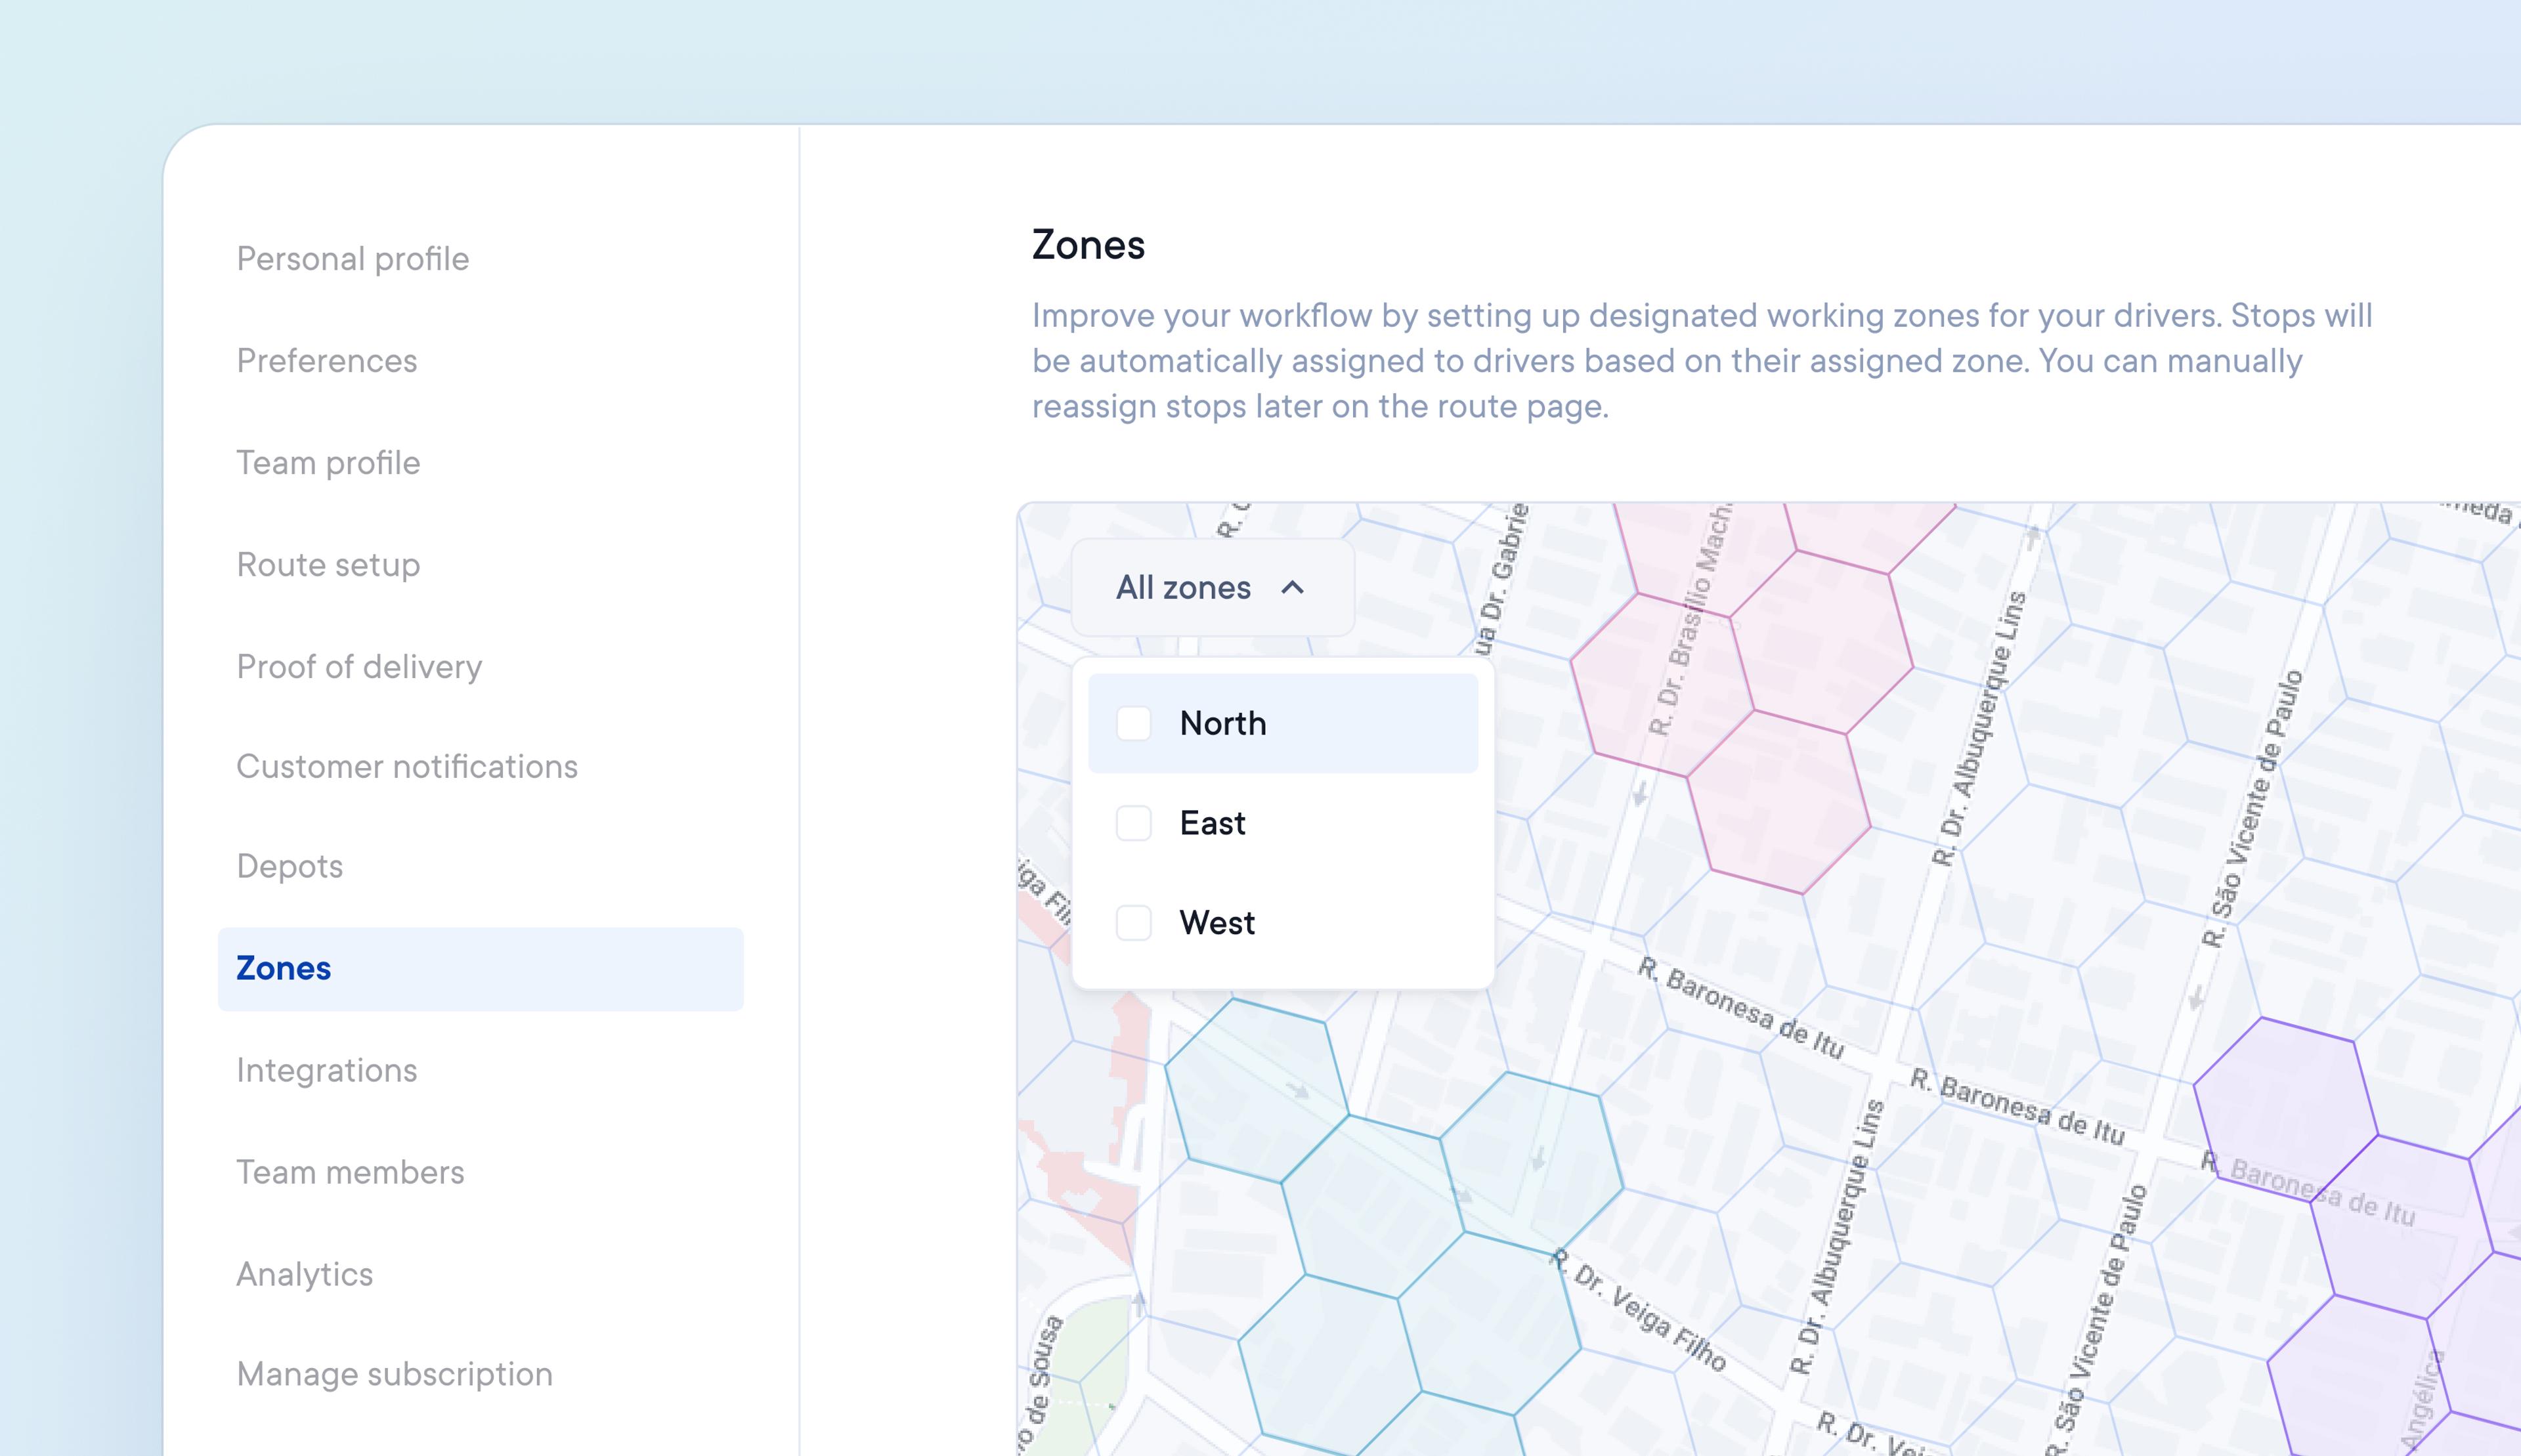
Create geographical delivery zones to assign stops based on driver location automatically
In the past, dispatchers had to format delivery data or make changes to optimized routes if they wanted to assign stops in specific locations to selected drivers.
It is now possible to create custom delivery zones. Any stops within a zone are automatically added to a route in that area. The route is then sent to the driver assigned to that zone.
How to create delivery zones
- Go to Settings > Zones
- Click on the map to select the zone area
- Name and color code the zone
- Assign a driver(s) to the zone
How to use delivery zones
- Import route data
- Stops are automatically added to a route within the same zone
- Routes are assigned to the driver for that zone
- Stops outside of zones are automatically added onto the most suitable route

Automate delivery operations with Circuit’s latest API update
Earlier versions of the Circuit for Teams API did not facilitate the optimization and distribution of routes to drivers.
The latest version allows users to integrate their existing systems with the Circuit for Teams API for end-to-end automation of delivery operations. From data import through to optimizing and distributing routes to drivers.
How to integrate with Circuit’s API
Go to Settings > Integrations to read the complete technical documentation and best practices.
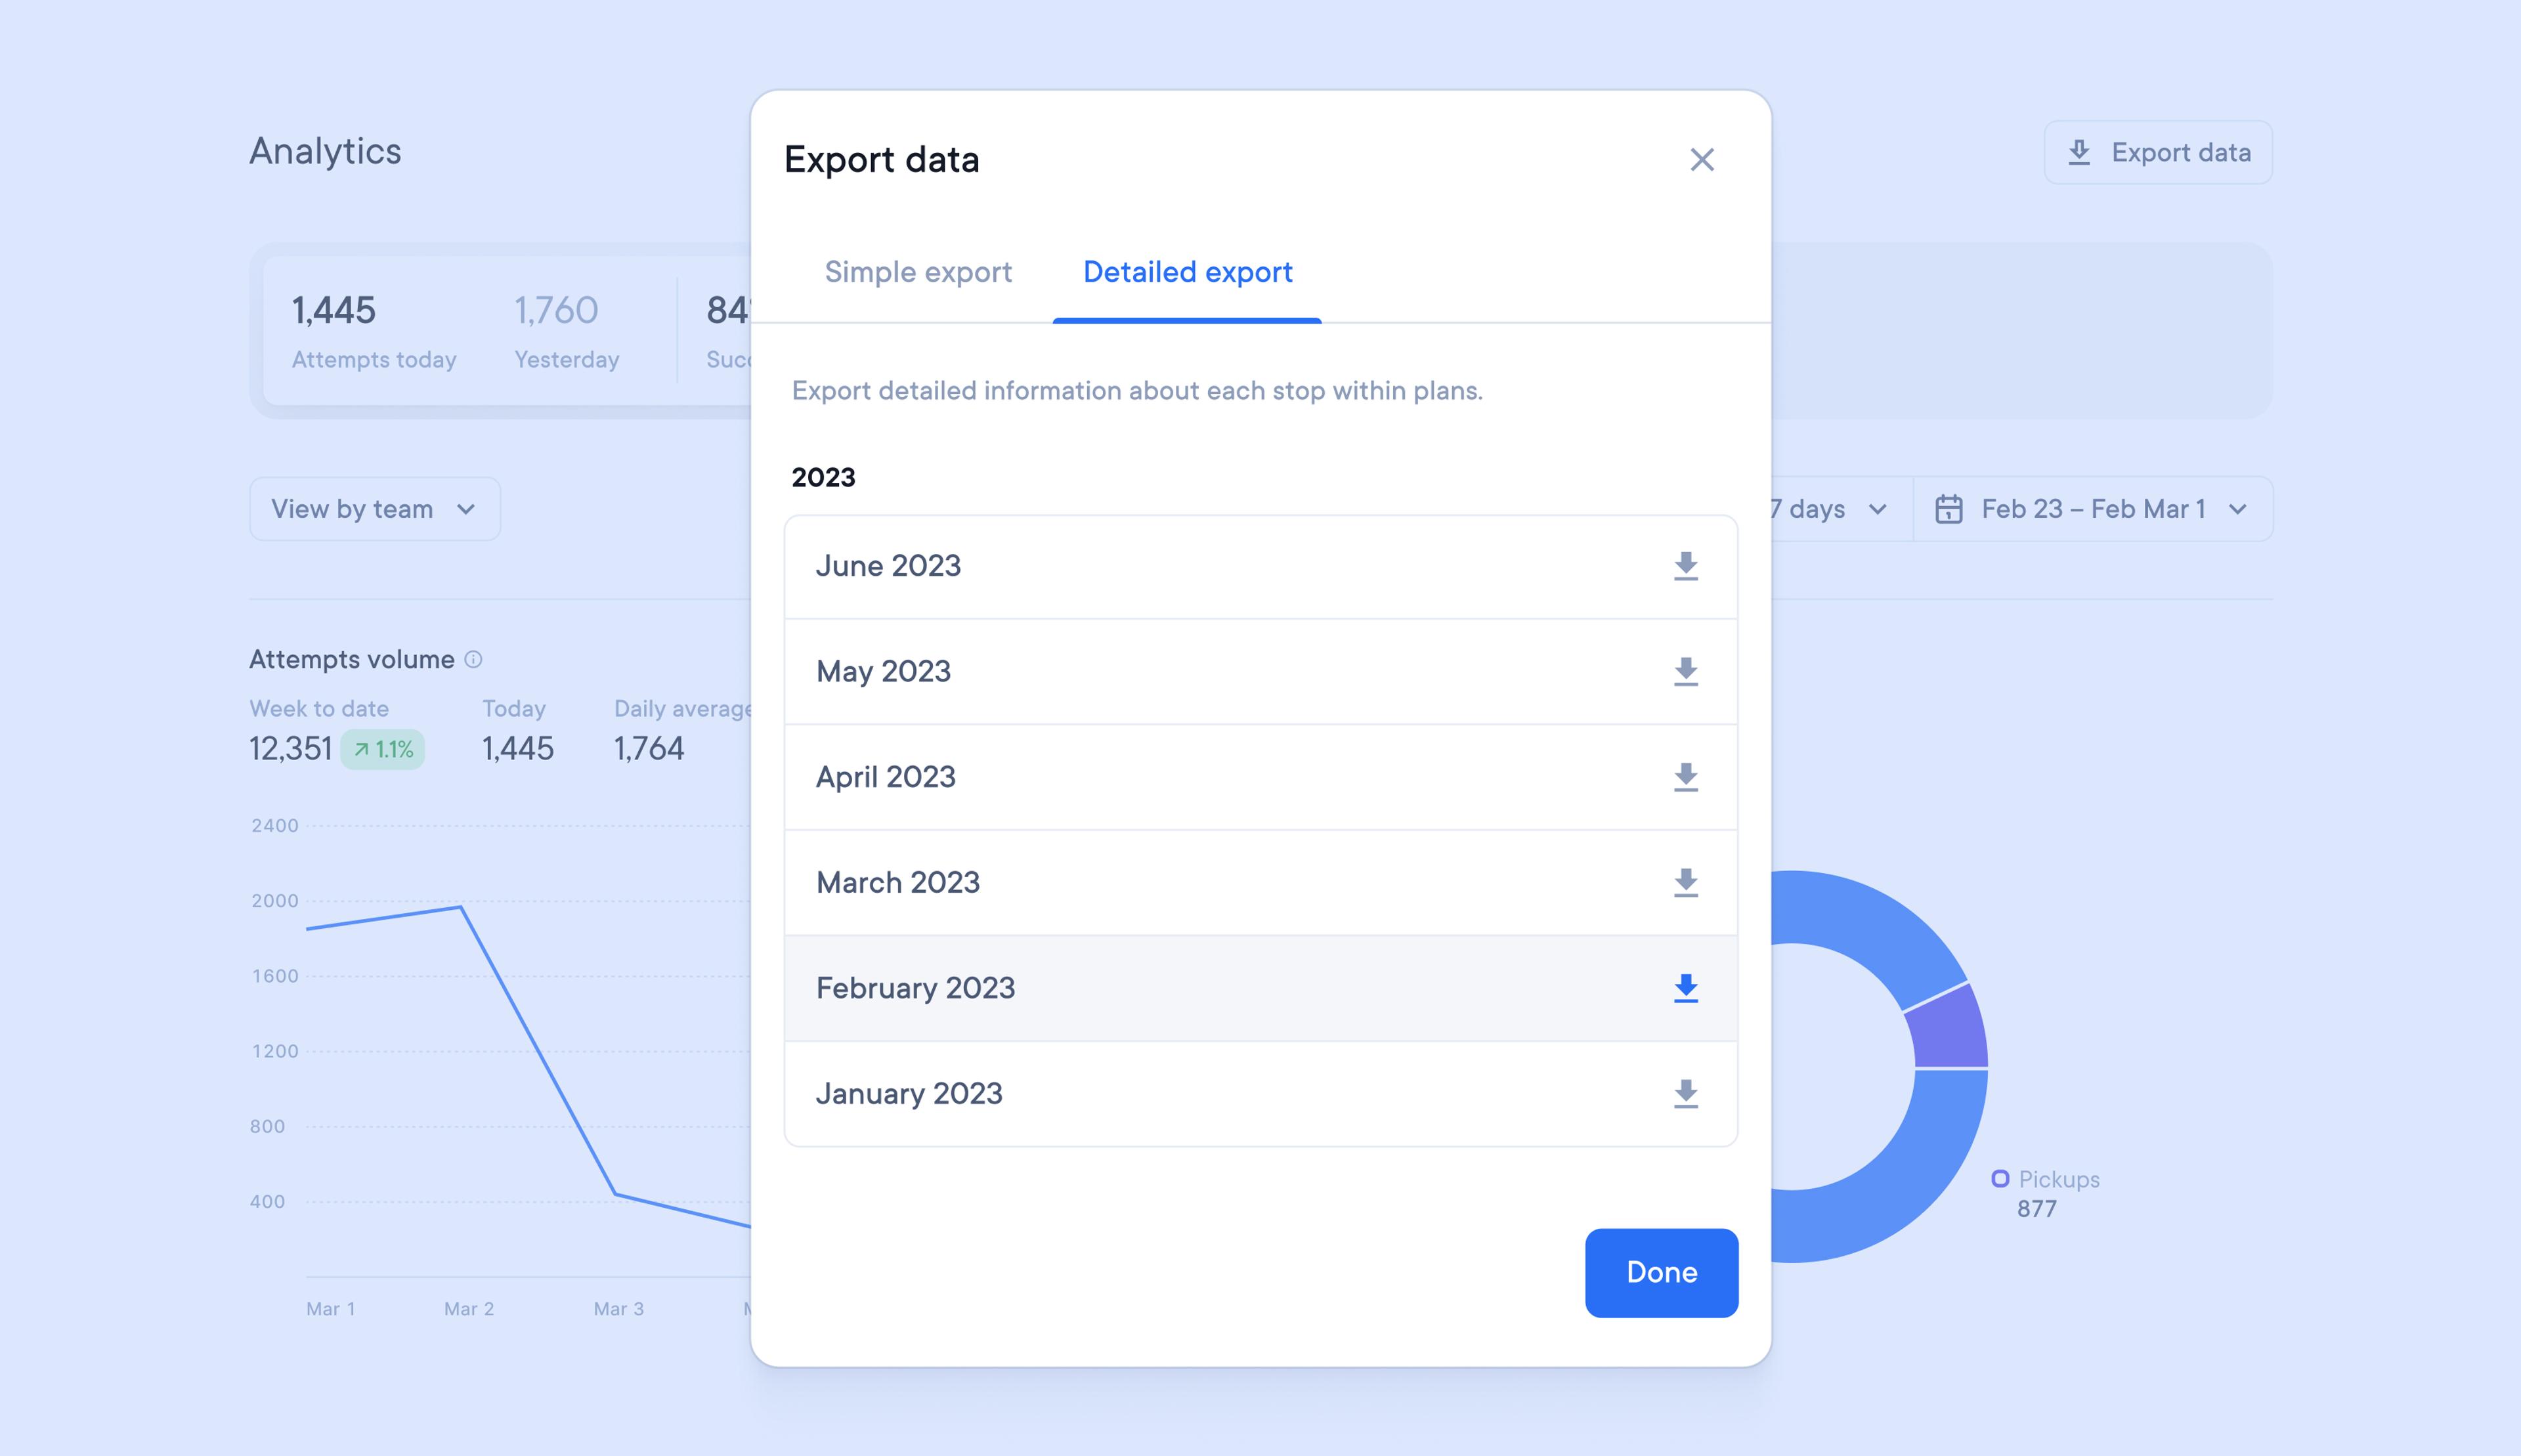
Easily export detailed delivery data for deeper insight
It was previously only possible to access detailed delivery data by performing a global account search. This would only provide results for the specific information that was searched for.
Now monthly reports containing detailed delivery data can be exported at the touch of a button, giving you instant access to granular performance information.
How to download detailed delivery data:
- Go to Settings > Analytics
- Click > Export data
- Select > Detailed export
- Select the month
- Click done